We had suffered a catastrophic failure of our driver's side rear wheel hub. The repairs were involved and spanned several days as we waited for parts and did the things necessary to prepare for the re-assembly and installation of the new hub. In the end, we would discover that the damage was much more severe than originally thought and it was only through the help of a number of individuals that we were able to get back on the road. Thank you Kai, Mark, Rob, Ben, Jason, and Jim. The photos below are what we saw.
Mark Mitchell was kind enough to send me the relevant pages from the 1300L shop manual to provide me guidance in the repairs. I had to review these a number of times before getting the gist of what was required. Plus, the manual does not "tell all" and there is a bit of "in between the lines" interpretation that is required to do the correct actions.
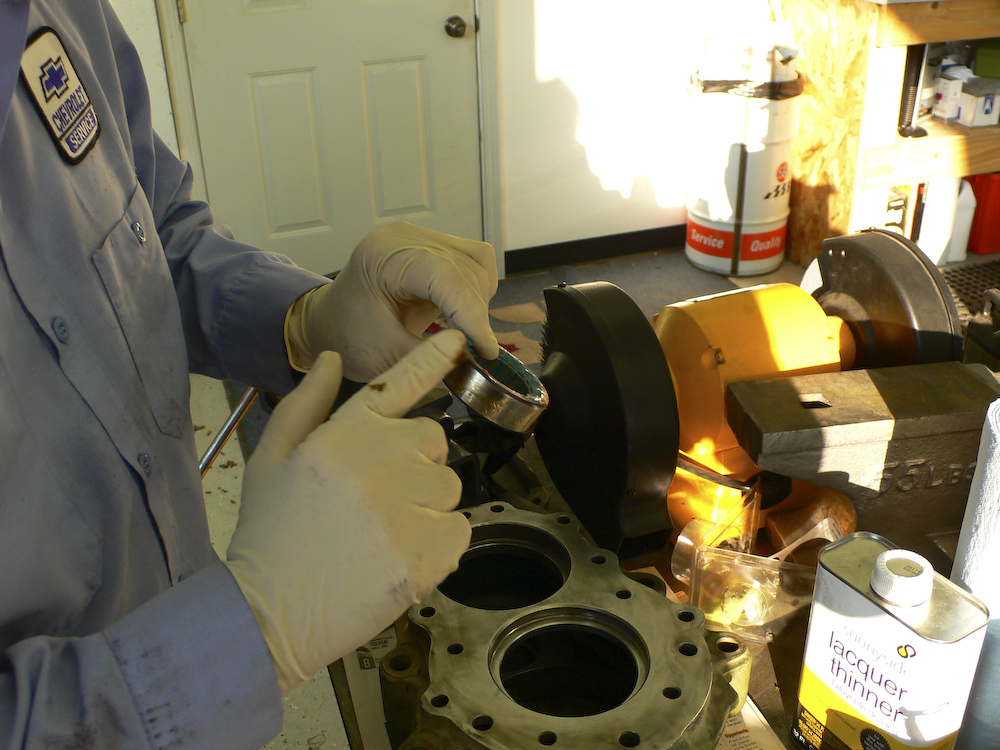
Ben works at a local car dealership in Helena, so he took my old hub casting and had it steam cleaned. Sadly, I did not know what to look for and would only later determine that there was terminal damage to the casting that would require a full replacement.
Rob Pickering busted his hump getting me replacement parts and ended up taking apart 6 axle sets to find one that was the correct configuration. He put the gears and bearings into a box and shipped it overnight to me at Ben's in Helena.
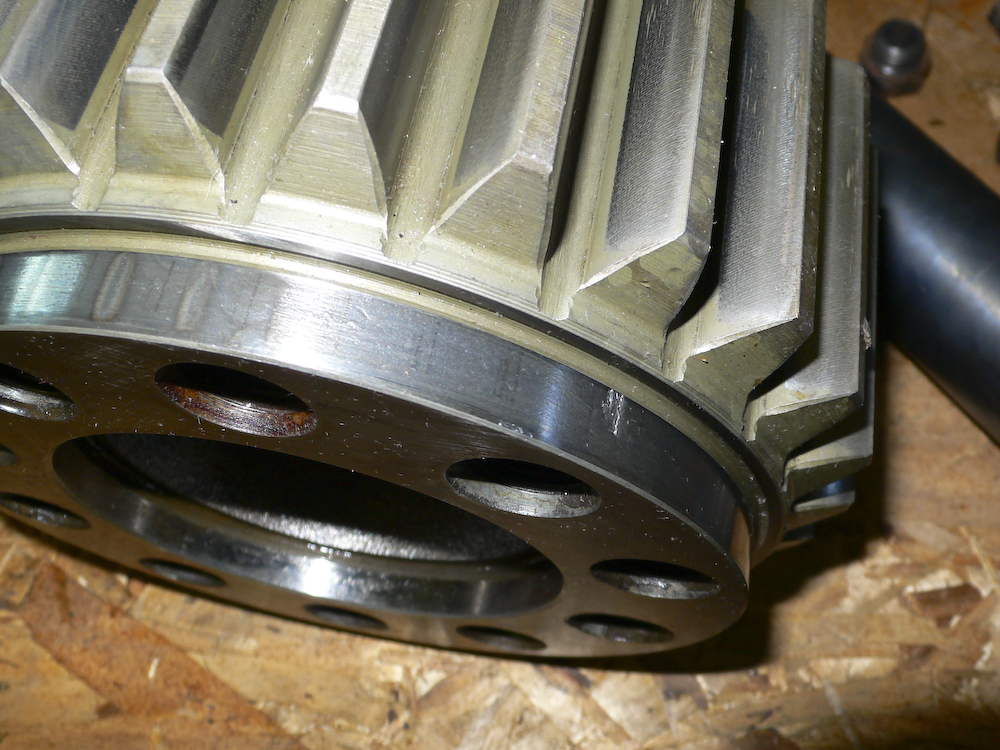
Several components were used and while they had some wear and tear, they would likely get me back to San Diego. The surface above is the race for the roller bearings and has several pits. Eventually, this will cause the assembly to fail, but hopefully not before we get home. In the end, this will have to be replaced as it will surely fail at the worst possible time. They ALWAYS do.
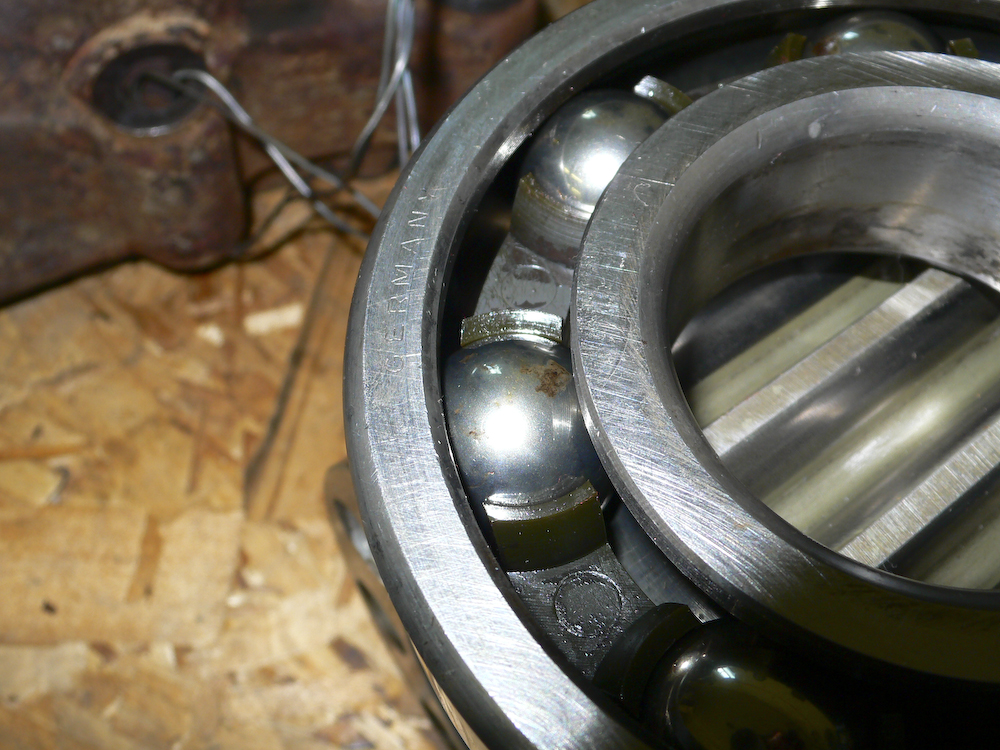
The deep groove ball bearings had small blemishes, but should be serviceable.
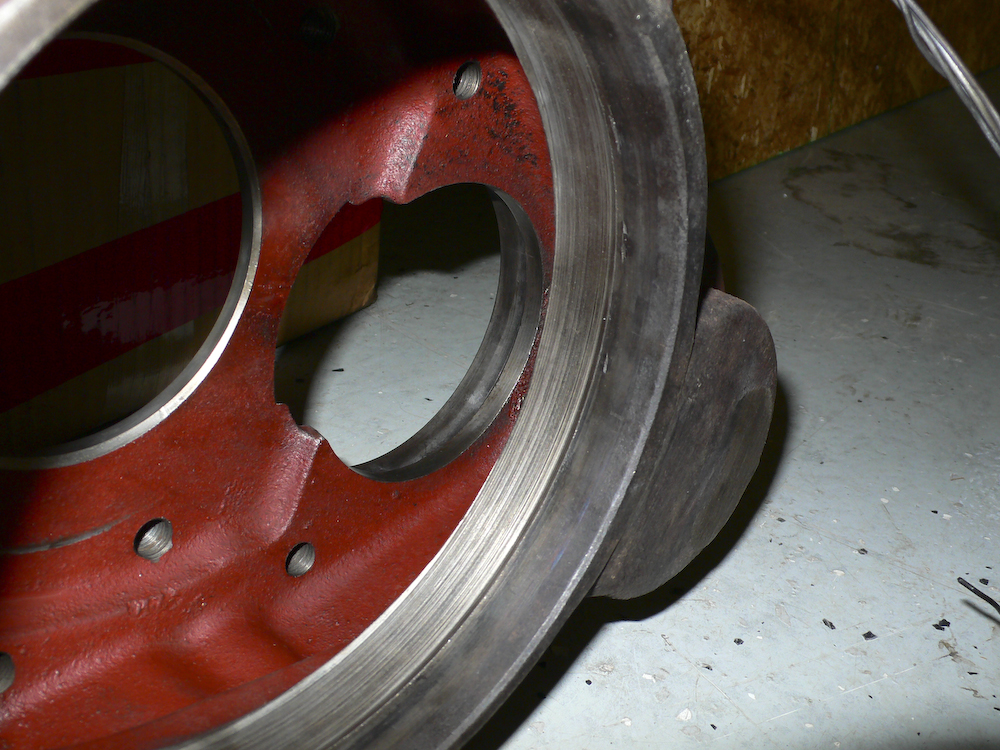
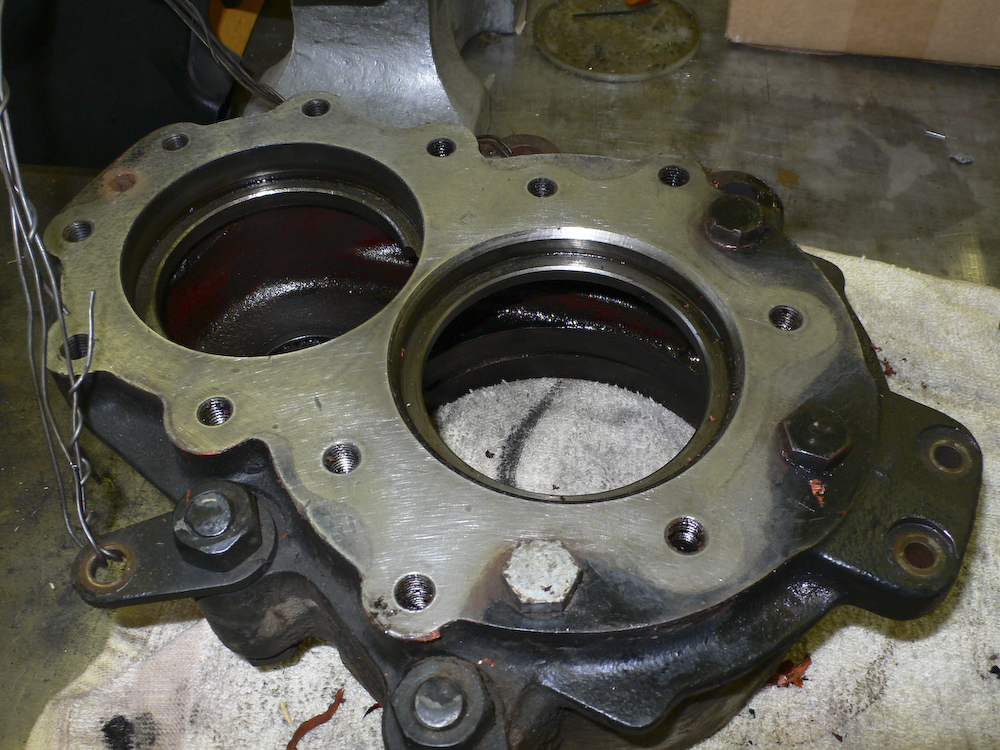
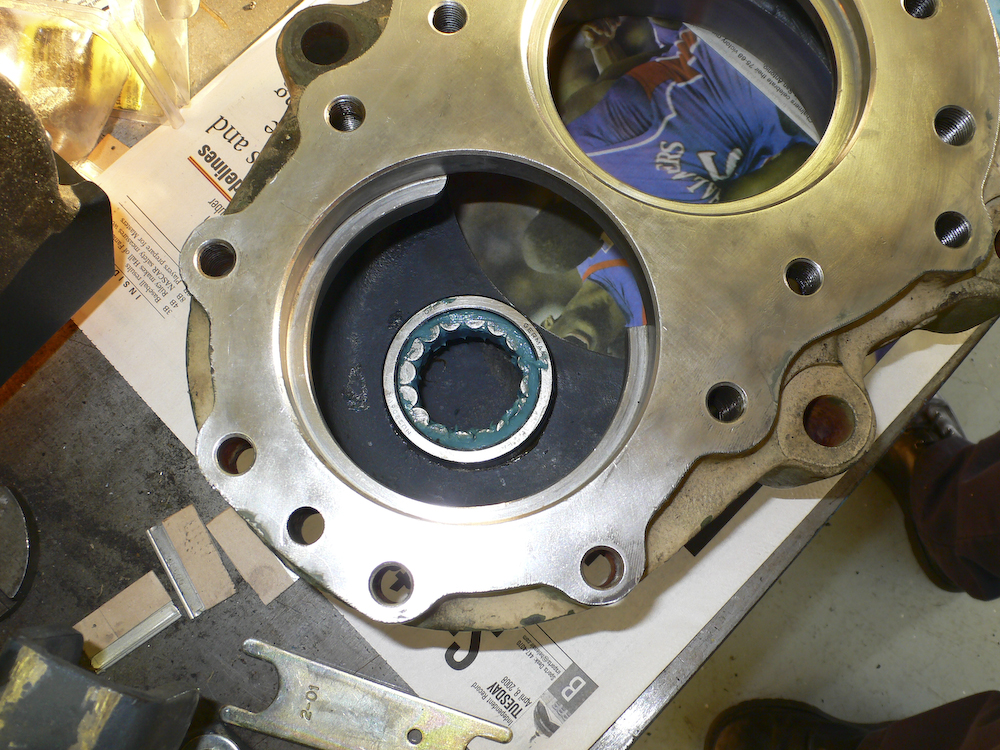
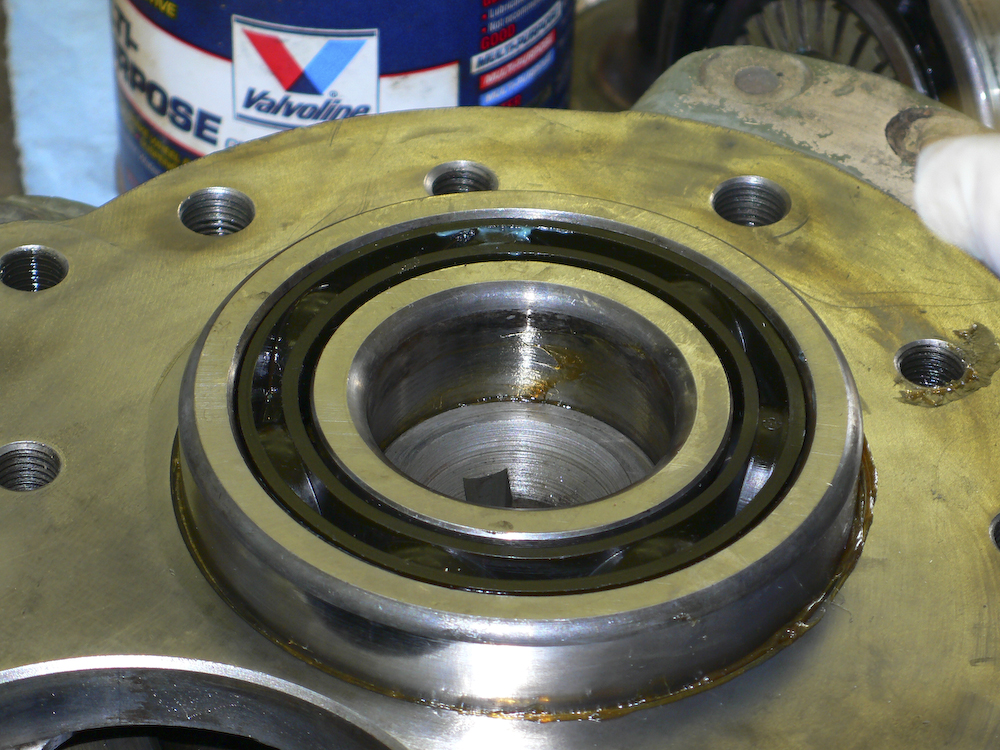
The bad news. Upon cleaning and subsequent inspection, I discovered that the large bearing on the wheel gear had fused to the gear and the bearing had spun inside the casting wearing a deep grove in the casting and rendering it scrap. The shiny surface above should be smooth and flat, but now it has a groove and a lip. Rob was able to find an appropriate casting and sent it overnight as well.
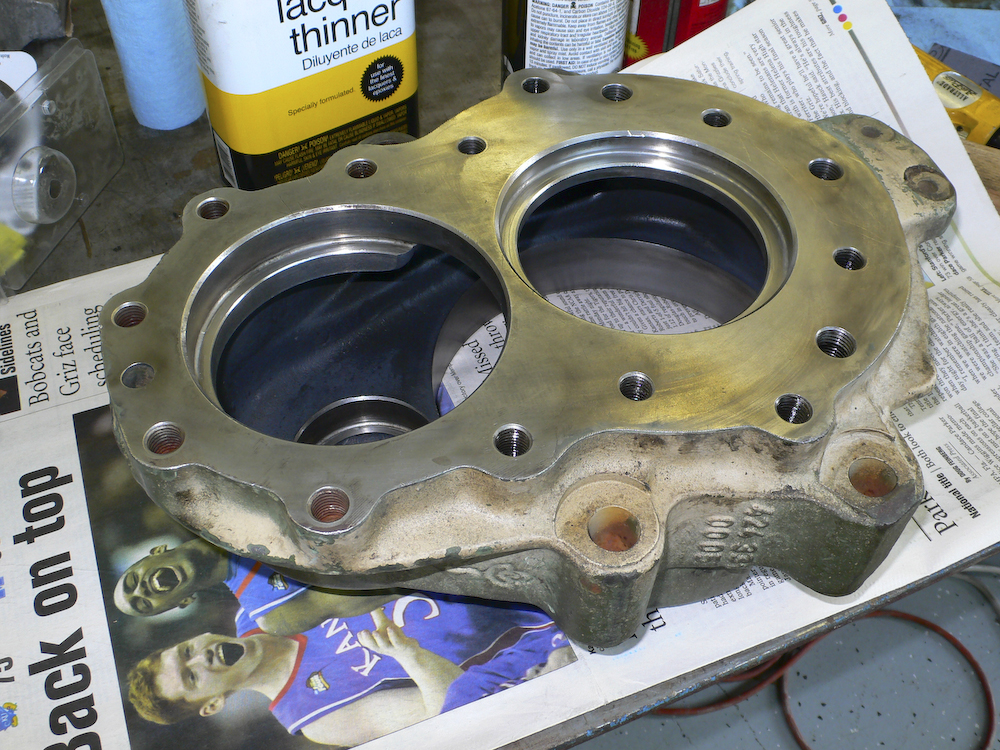
The new casting cleaned and ready to go.
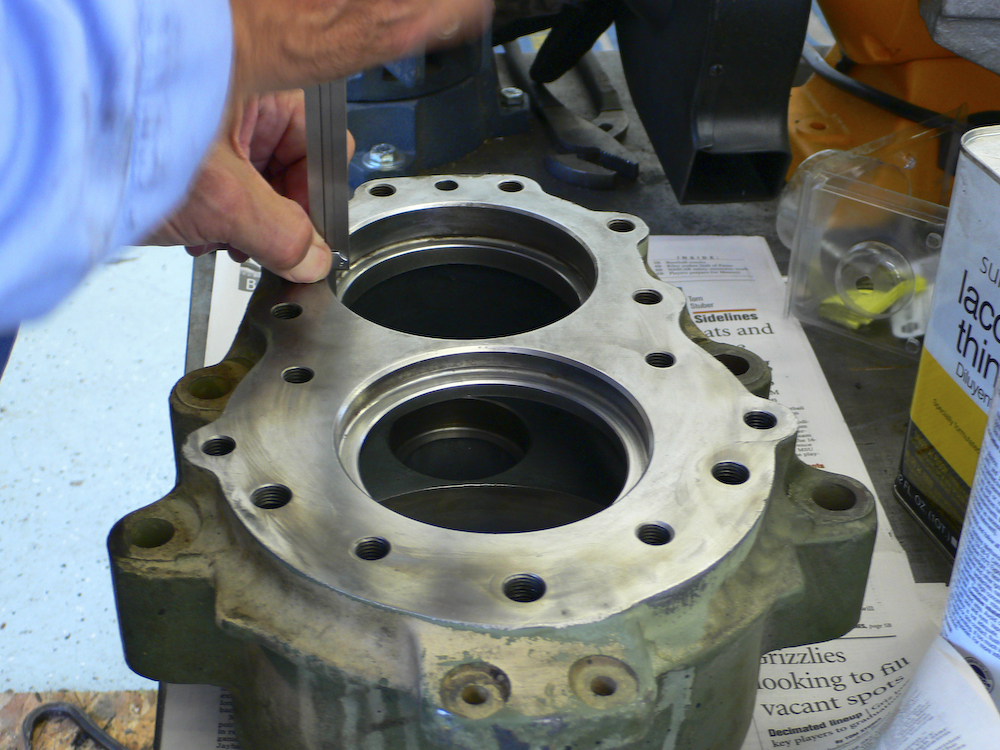
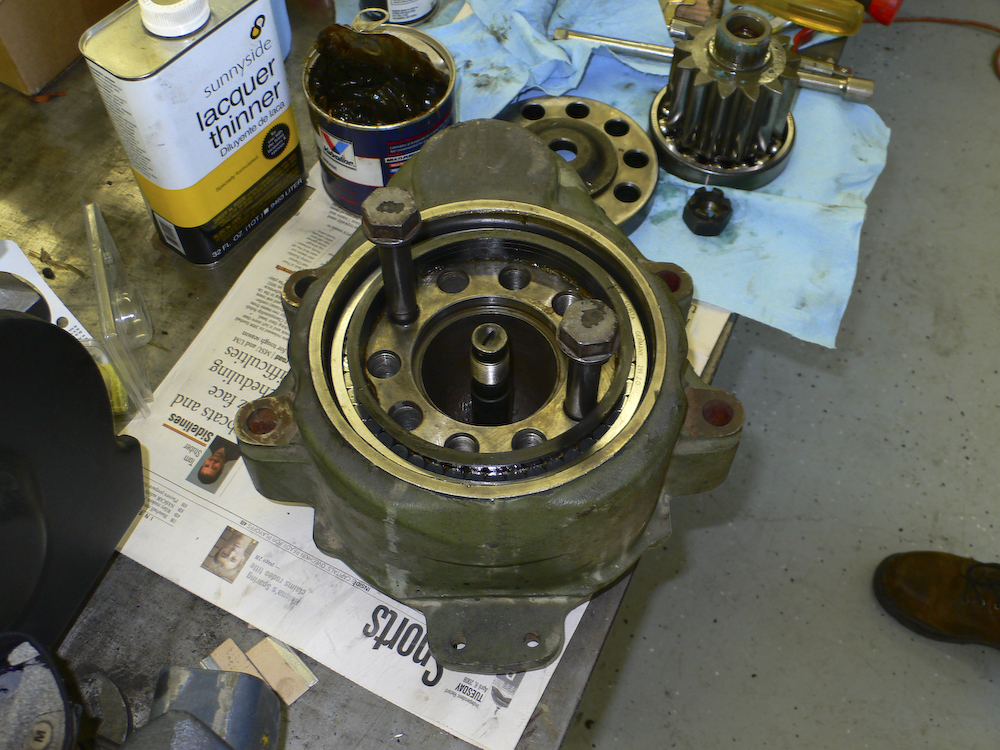
The first step is to measure the casting, the axle housing and the bearings to determine if shims are needed.
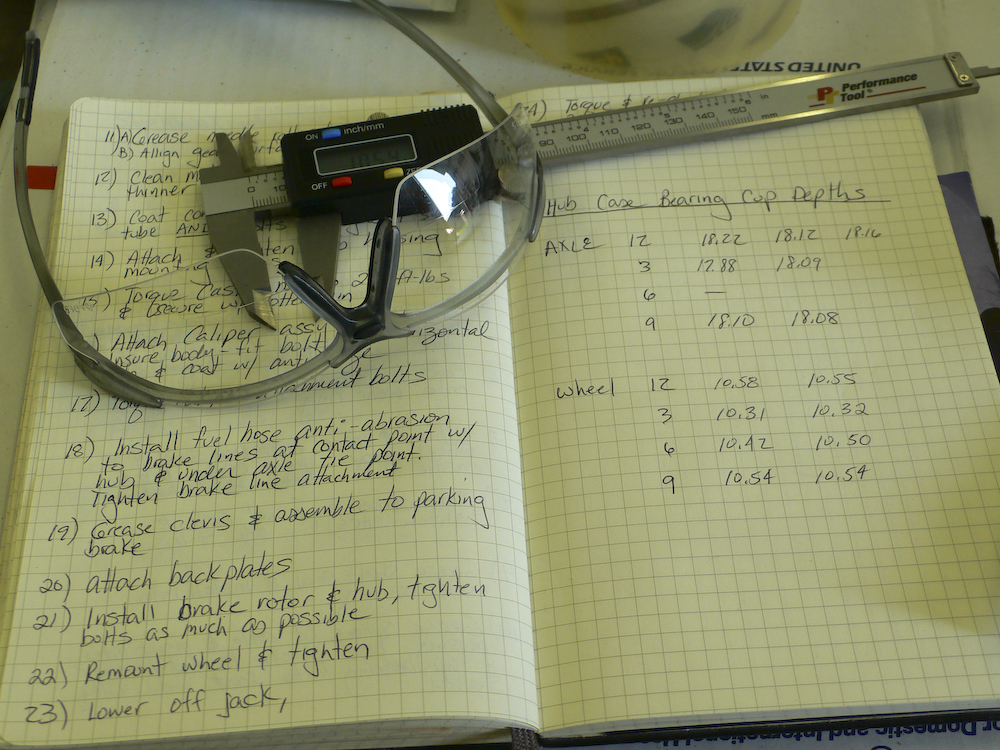
Writing things down and taking notes is a good thing, particularly if you have CRS disease like me. In the end, the measurement and calculations showed that no shims were needed on either bearing pocket.
Greasing needle bearing for driver gear prior to installation into case.
Bearing tapped into place with a plastic mallet.

Packing the inner wheel gear with grease prior to installation.
Easy does it on this one.
Seated, but the wheel gear still has to be pushed through the bearing.
Installing the outer roller bearings. Note the plastic retainer on the rollers that will naturally come off as the bearing is pressed into place. Don't make the mistake of pulling the retainer too soon as you will have a hand full of rollers on the floor! I did not do this, but I was advised that it would be a bad thing to do.

Plastic retainer is off, bearing is nearly fully seated.

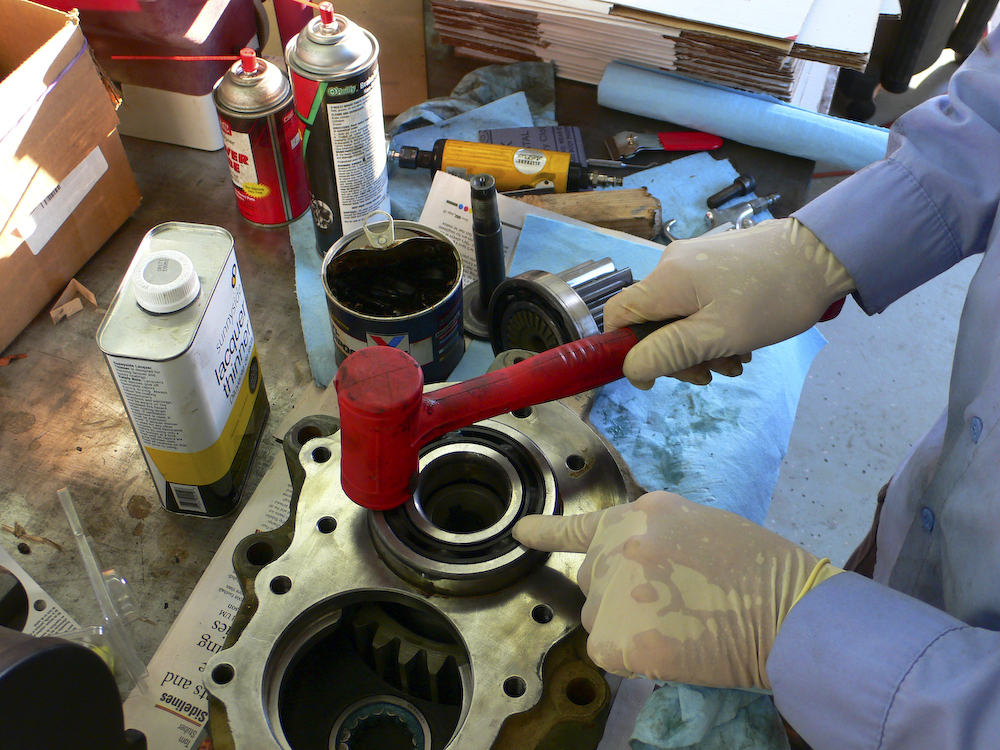
Tightening the driver gear onto the axle shaft. I bent Ben's vice handle trying to get enough "bite" on that hardened shaft to meet the torque specification.
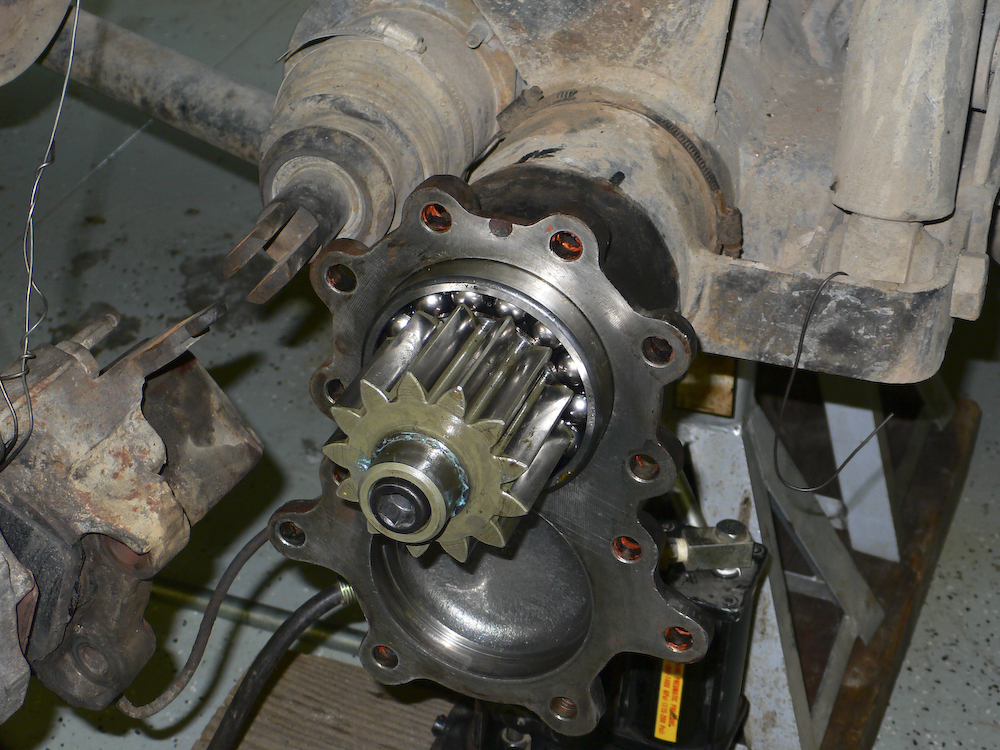
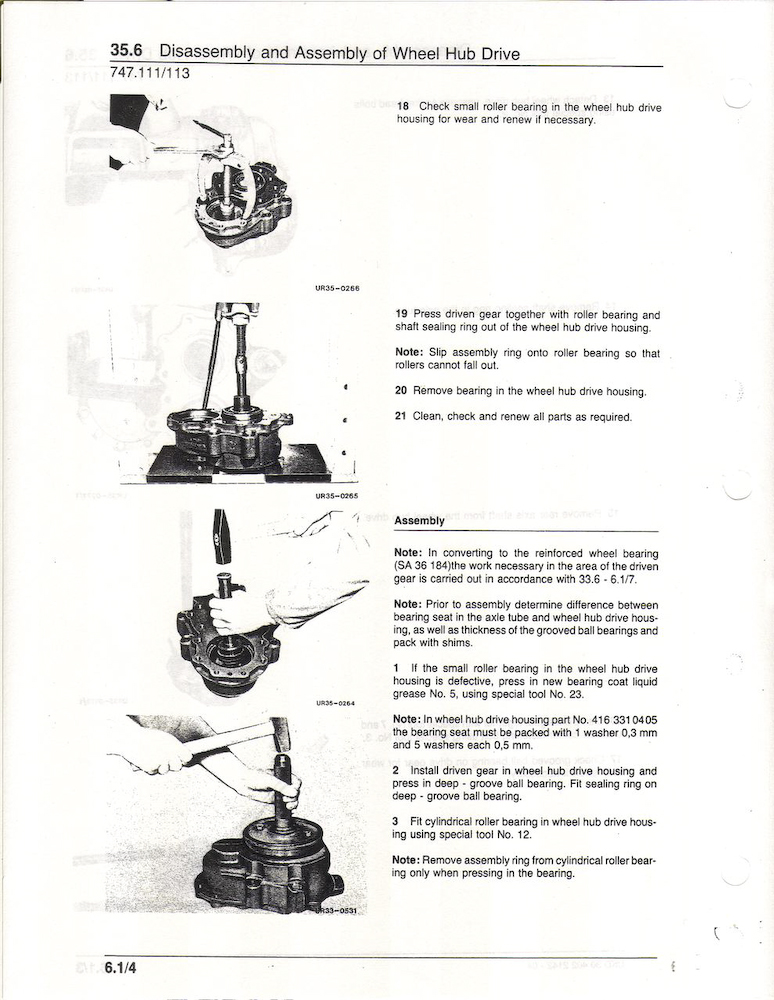
Axle-gear combo installed in axle housing. The bearing has been tapped into the housing, holding the combo in place for the next step.
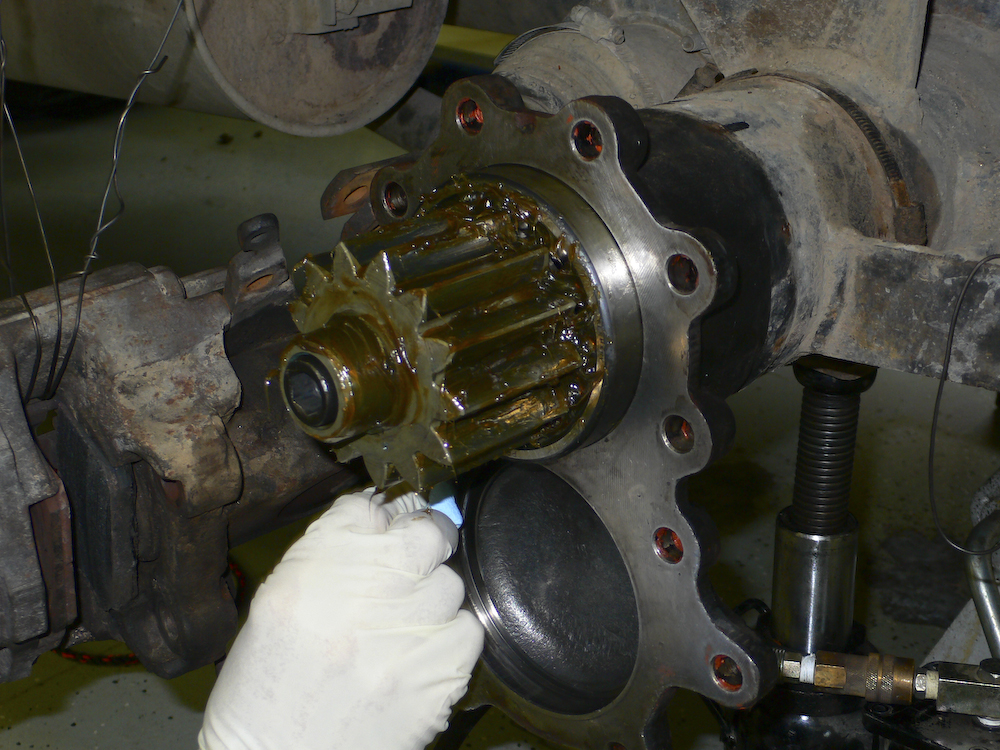
Get it fully coated with grease prior to installation of the hub assembly.

The hub assembly was hoisted to the assembly using an engine hoist. The assembly is heavy and was somewhat difficult to mate correctly. Patience and a rubber mallet won in the end.
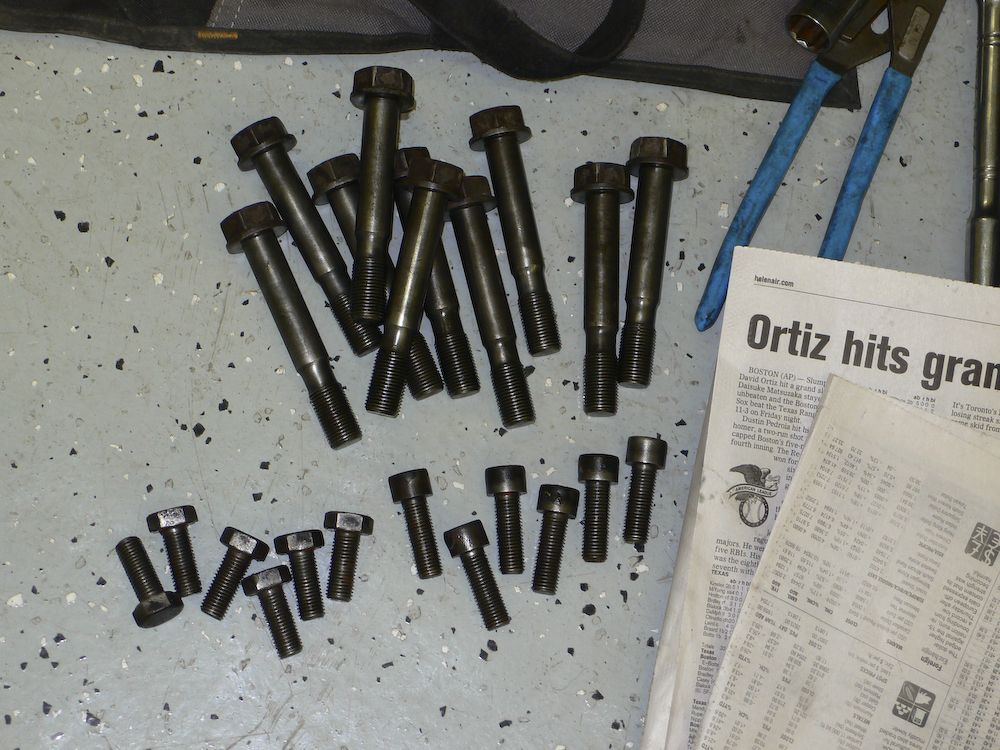
The array of bolts require to make the assembly possible. The long bolts hold the hub to the wheel and brake rotor.
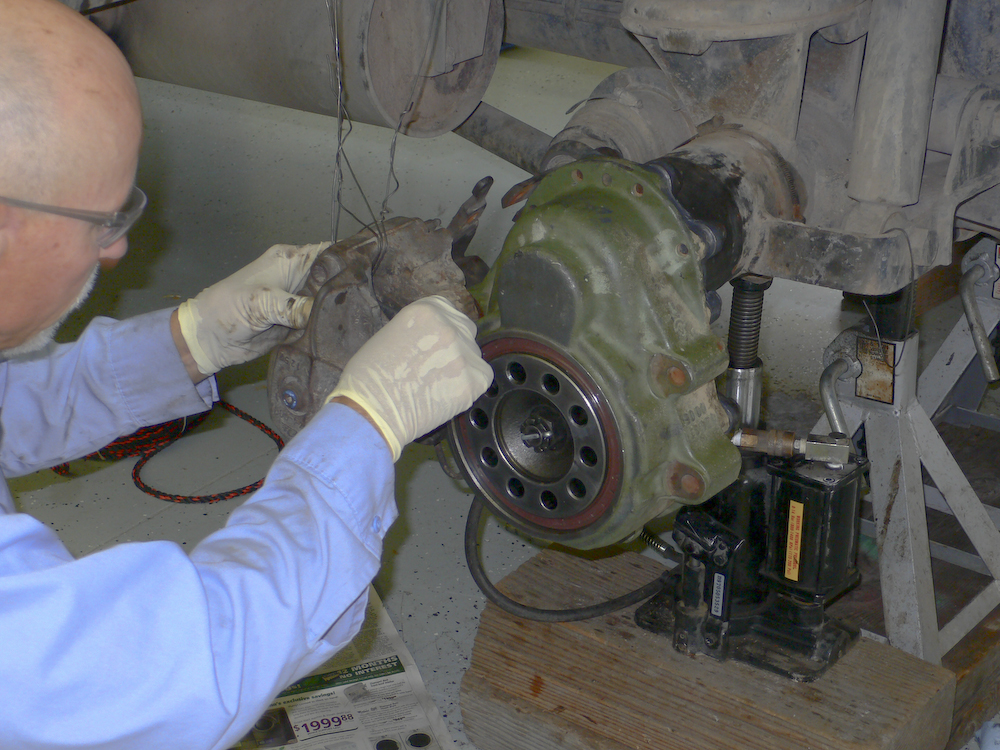
Adding the brake calipers to the assembly. The lower bolt is a "body bolt" that holds the brakes on tightly. It was a bitch to get out, so I put anti-seize on it so I can disassemble it easily in a few weeks when the new gear arrives.
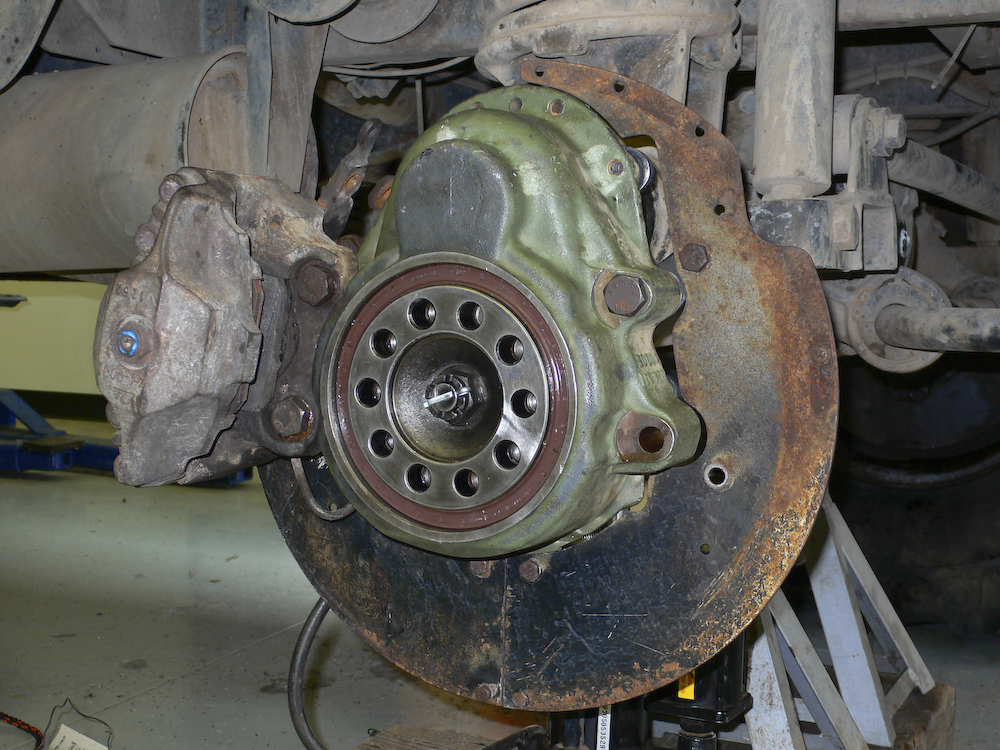
Getting close. The stone protection on the back of the wheel has been added. Next comes the rotor and the wheel hub.
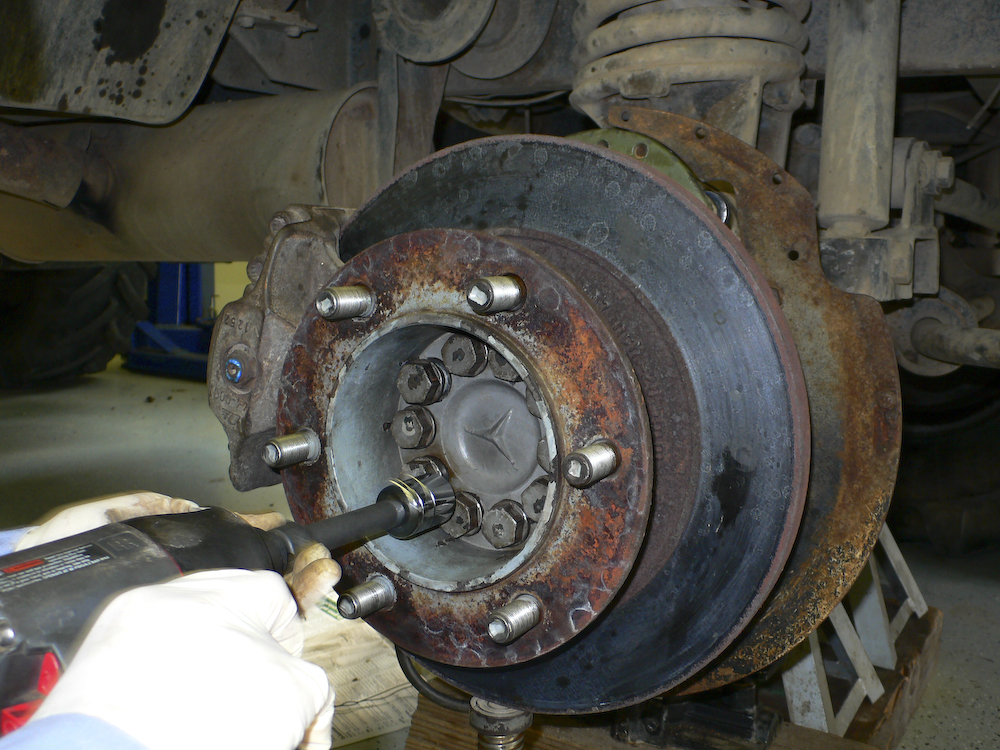
It was a bit tricky to get the hub, rotor, wear ring and gear all aligned, but I finally did it. Next, they have to be tightened to allow the wheel to be added for final tightening.
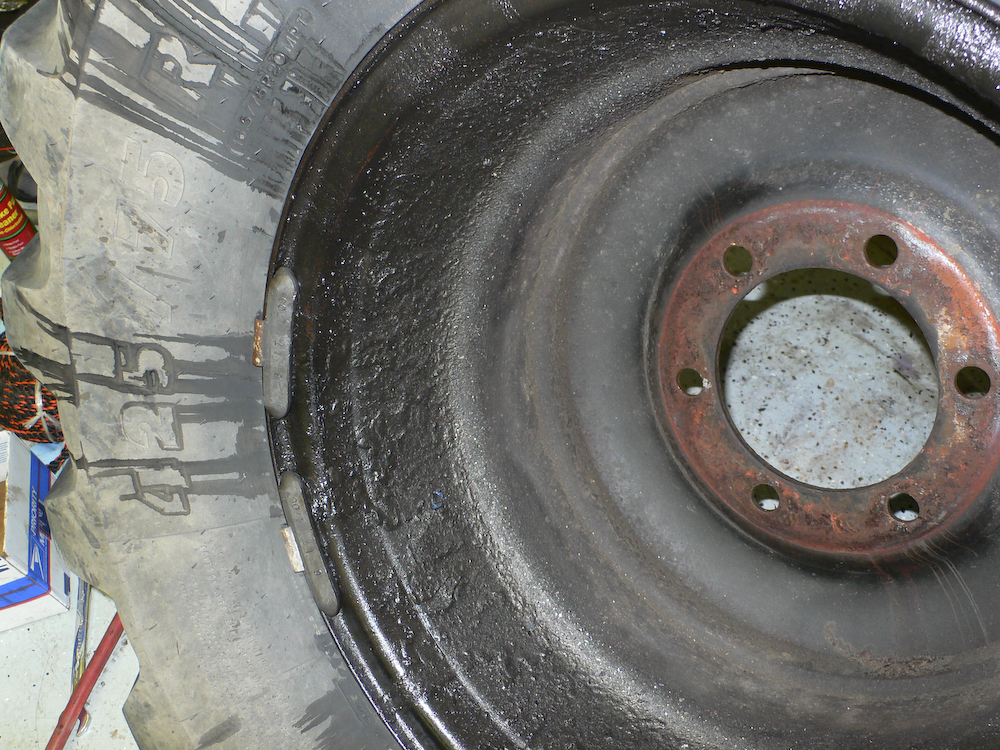
Yuck. Ben pointed out that the inside of the wheel was coated with the debris of the hub failure -- grease and burned oil as well as metal shards. I had to clean it with a scraper and it took about 30 minutes to get it adequately clean.
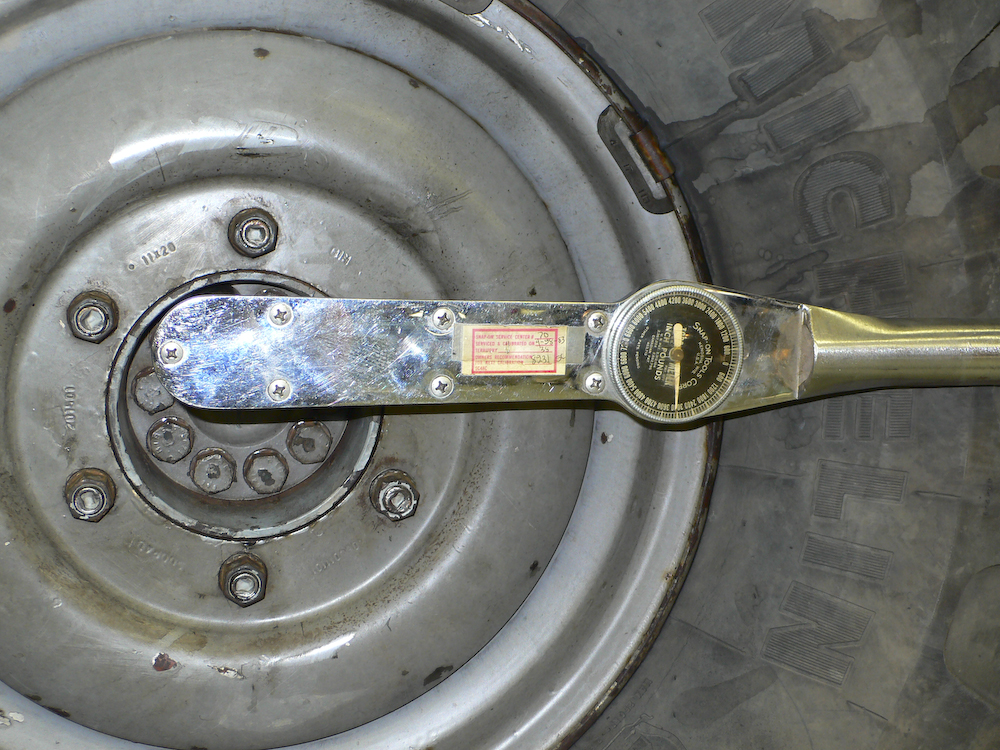
Those hub bolts have to be tight. Real tight. 320 Nm which is about 2800 inch-pounds. One of Ben's buddies lent us his high capacity torque wrench.
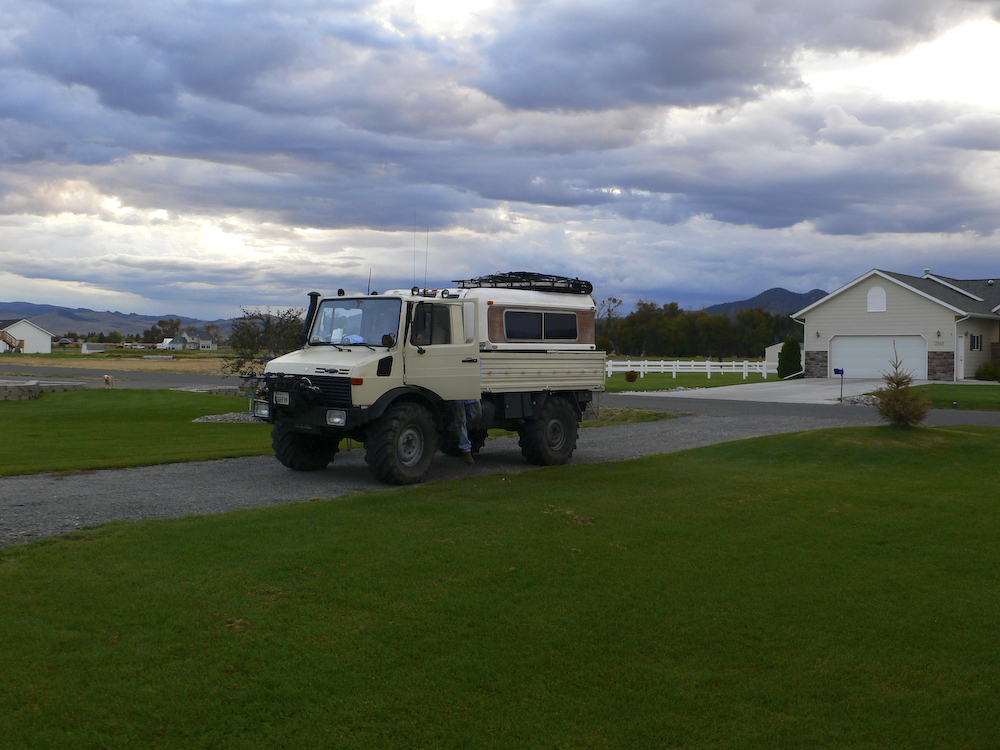
Out of the garage finally. I purchased an infrared thermometer to keep track of wheel temperatures and we set out to get a tank of diesel at the local station.

I was still not sure that the repair would hold, but in the end, we headed south on the freeway for a few miles and periodically checked the temperatures. All was normal, so we returned to the shop and raised the camper for the night.
This was a ton of work. It was not as complex as I first anticipated and has, in some respect, increased my confidence in being able to do "big" repairs on my truck. That said, we were sitting in Ben's garage for the better part of 2 weeks getting this accomplished. Most of the time was assessment and waiting for parts to arrive, but it was still 2 weeks. The actual repair actions took about 20 hours all told. I do not know the age of the bearing that failed. There was no advance warning, so if you were going to do a long expedition, like driving to Alaska, say, I would almost suggest doing a full replacement of all the wheel bearings and seals before the trip. That way, you would not have to be sitting by the side of the road in the Yukon waiting for help.
Special thanks again to Rob Pickering, Kai Serrano, Mark Mitchell and Jim Ince. And we are extremely grateful to Ben and Krista Palmer for sharing their home and shop with us to allow this repair to happen. Back at you guys, we owe you.
| Previous Adventure | ||
Photos and Text Copyright Bill Caid 2008, all rights reserved.
For your enjoyment only, not for commercial use.