Action Report 20090420
Nearly 2 years ago, I added a 1978 fiberglass Alaskan Camper to my 1300L Unimog. At the time, I was skeptical about how much I would use the camper, but after the first outing, I saw the light and wondered why I had not installed the camper years earlier. Since the installation, we have done a number of very long road trips in the camper and during those trips we've used it to it's full capacity. We did a substantial amount of hard-core four wheeling, including the Altar Desert several times. Since the camper is 30 years old, things fail. When we did an internal rebuild upon installation of the unit, but there were several subsystems that were working sufficiently well to ignore at the time. Given our heavy use, we have essentially worn out the remaining subsystems that we did not "touch". First to go was the catalytic heater. But, that was cheap and easy to replace. Next was the hydraulic lift mechanism that raises and lowers the top. For many years, the Alaskan Camper was the only camper on the market that had a hard shell that lowered during driving and raised during camping. It is a solid design that has passed the test of time and provides much lower wind resistance and better side hill performance than a fixed roof camper. The bad news is that you have to raise and lower the roof and after 30 years of use, the hydraulic seals are toast. During our last outing, the lift system was leaking so bad that it was requiring a quart of hydraulic fluid a week to replace the seepage. Jack oil is cheap, but my new carpeting was not. But, the carpeting is not new anymore as a significant amount of the fluid seeped into the carpeted area. So, the only thing to do was to service the hydraulics. The system consists of two main components. First is a pump and reservoir combination that looks like a bottle jack on steroids. It has a removable handle and requires jacking to raise the roof. Lowering is accomplished by opening the jack pump valve and letting gravity do your work for you by lowering the top and returning the fluid to the reservoir. Both the main seal in the jack and the seal that controls the lowering were shot and bleeding fluid into the pump compartment. Removing the pump was not hard and finding seals was pretty easy. I got the seals at NAPA and Pep Boys. Turns out that Pep Boys had everything I needed for the task but I only went there when I could not find the correct seal at NAPA. After obtaining and installing the correct o-rings, the jack runs like new. We still have a ton of residual hydraulic fluid to police up in the jack compartment, but that will be seeping out for weeks.
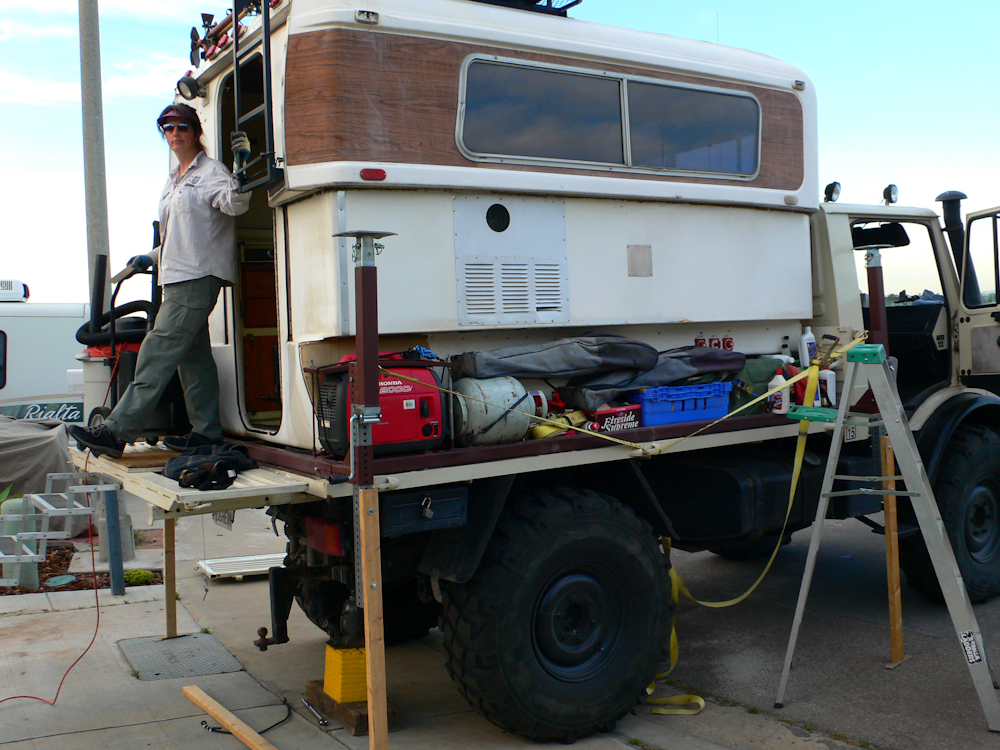
The second subsystem are the lifting rams. The rams are built into the fiberglass body of the camper and for all reasonable intents and purposes were never intended to be serviceable. But, this was not a reasonable situation. The leaks had to be addressed, so Kathleen and I crafted a plan that would allow lifting of the top without removable of the rams from the camper body. This would be a pretty difficult assignment in that we had to lift and balance 1500 pounds of fiberglass top about 10 feet in the air while the repair actions were being performed. Then, slowly lower the top allowing the ends of the hydraulic rams to mate up and the slide key ways to intersect. Amazingly, we completed the action with only one trip to Home Depot and the auto store. There was a ton of lumber that was needed to construct the lifting frame. But, once that frame was in place, we were good to go.
The photos below are what we did.
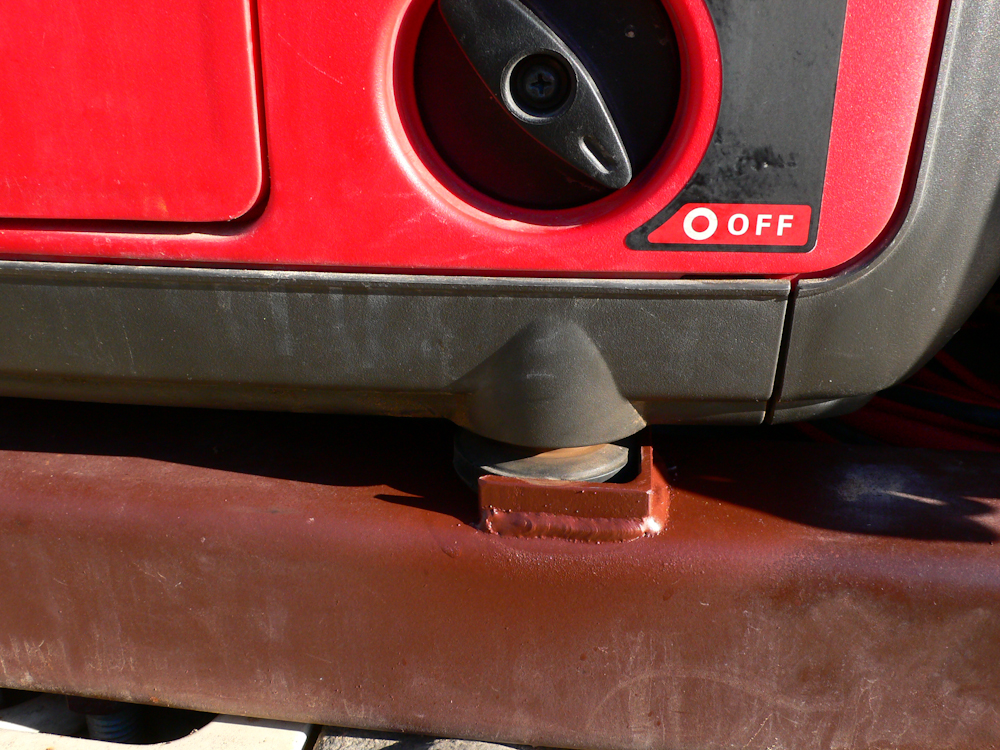
I have my truck outfitted with a Honda 2kw generator. They are very quiet and compact, but they do vibrate quite a bit. In fact, unless they are really lashed down, they will dance around in their own little area. To eliminate the wandering, I added restraining feet to prevent forward or lateral motion. The feet were cut from 10mm of 1.5" steel angle iron and then welded onto the main camper frame.
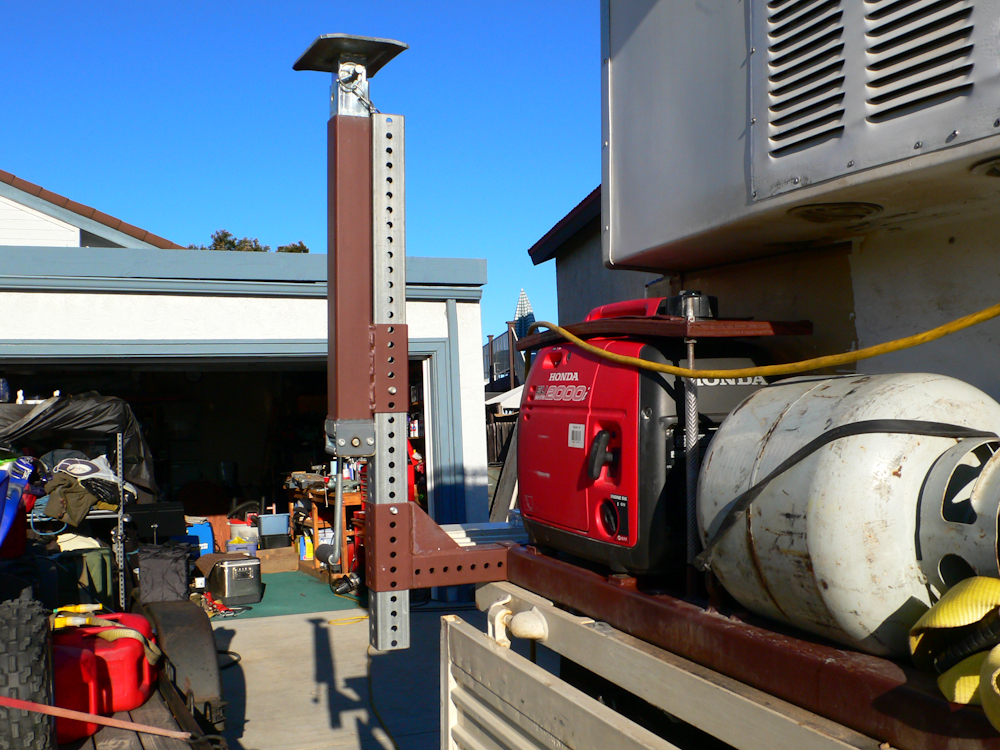
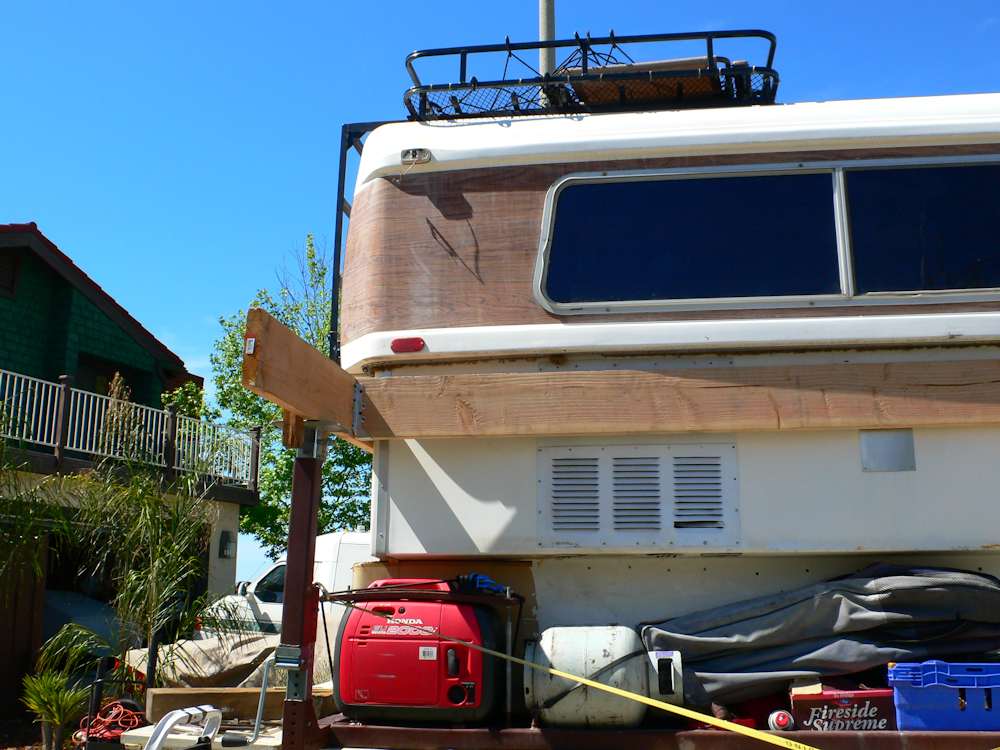
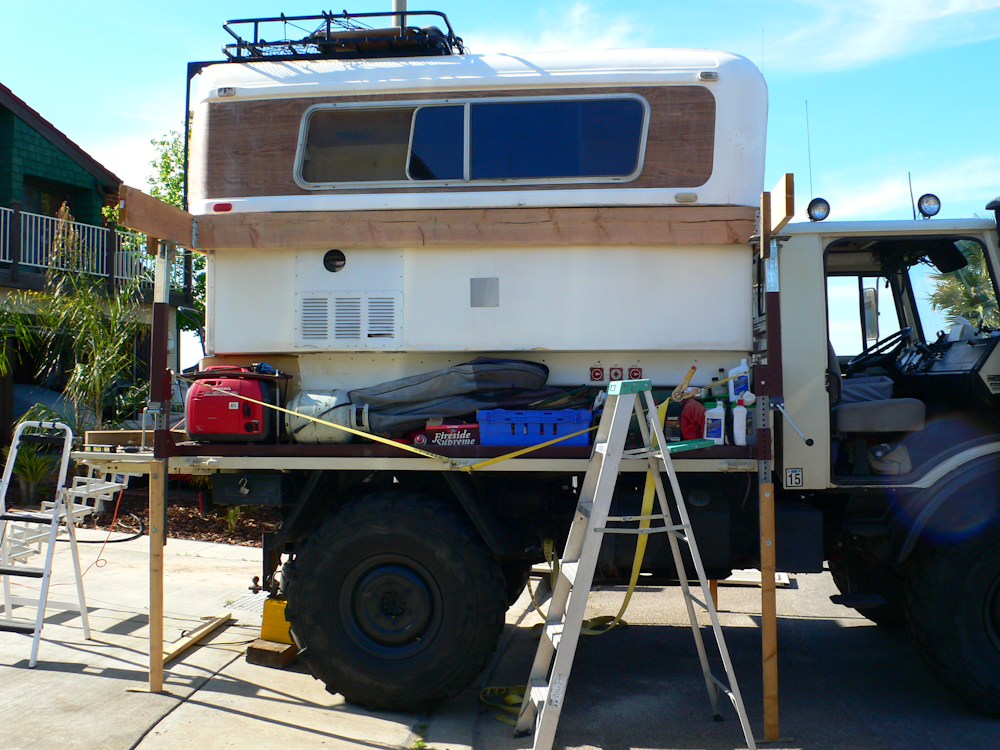
Moving on to the hydraulic issues, the primary challenge was lifting the top of the camper high enough to allow access to the ends of the rams. I felt pretty certain that the o-ring seals were the actual problem that was causing the gross leaking. To fix the problem, each of the seals would have to be exposed, removed and replaced with a new seal of the right type and size. Replacing a seal on a piston that is on your work bench is trivial. The real issue is getting access to the area of the piston that has the leaking seal. And the real issue to getting access to the piston is the ability to lift the top of the camper high enough to allow access to the seal-end of the piston. Our calculations suggested that 12" of lift should be sufficient. In the end that assumption proved correct. The photo above show our early investigation into the method. Essentially, the 4 lifting points at the corners of the frame would be used for pushing the camper top up. The jack assembly would be installed upside down and that would provide the lift. Since each corner jack is rated at 5000 pounds, we were way more concerned about things like lateral stability and balance. The photo above shows the preliminary test installation of the jack assembly to demonstrate viability. The plan was to put the jacks in the frame upside down and use it to lift the top. But, a wood frame will be needed to actually support the top and provide the lateral stability to prevent it from crashing down on our heads.
The preliminary assessment looks good, but part of the configuration will need to be tweaked. Once we finalized the plan, we headed to Home Despot for materials. We got 4 - 2x8x12' joists and some joist hangers.
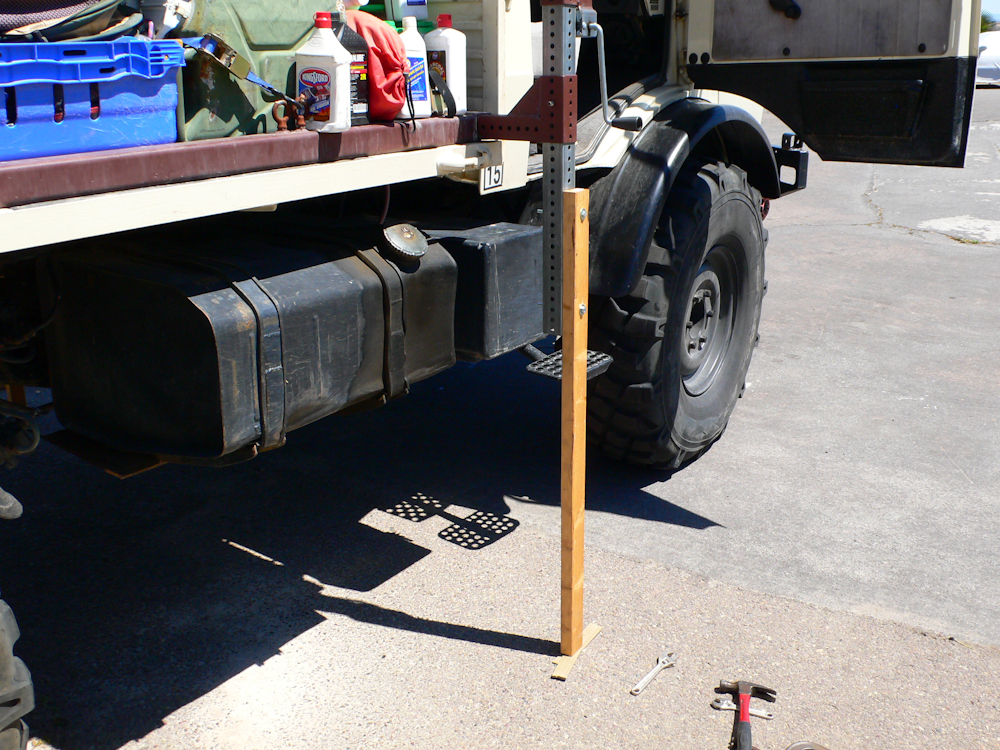
First, we have to stabilize the body of the truck from rolling under our weight. Since the camper top will be suspended above its normal position by about a foot, "roll control" will be critical. To achieve this, I got some long 3/8 bolts and took some spare timber and sliced it to the appropriate length. Then, holes were drilled that allowed bolting the timber to the descending part of the jack assembly. Finally, shims were inserted under the brace to insure that the springs were partially unloaded and the brace, rather than the springs in the suspension, would take the load first.
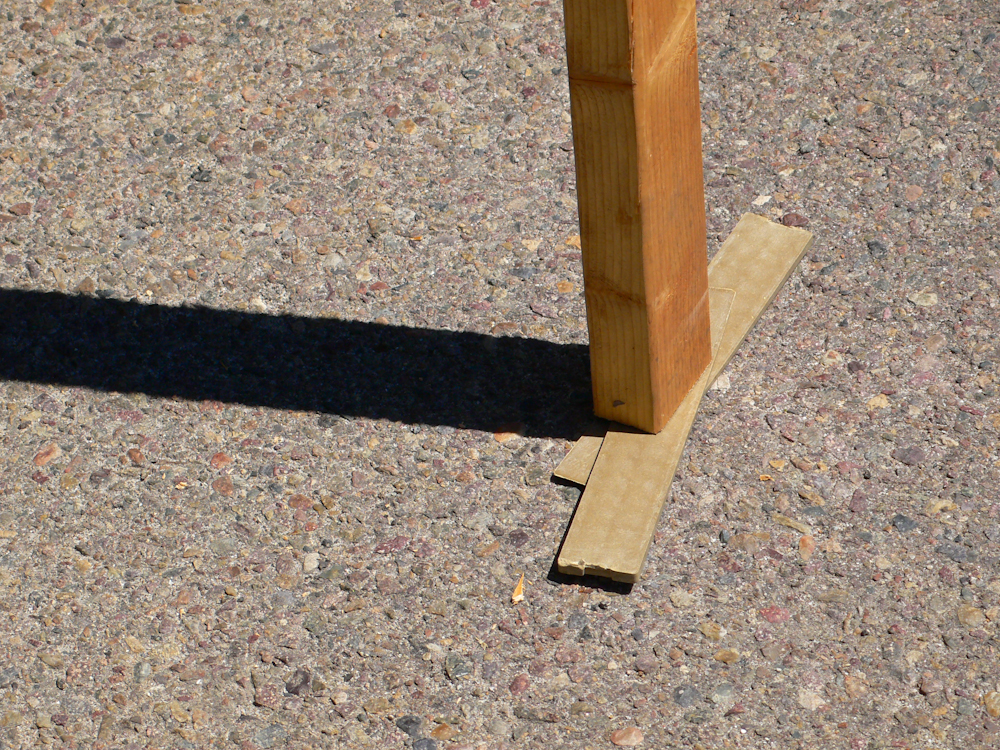
Above, a view of the shims. These were pre-made and worked well enough.
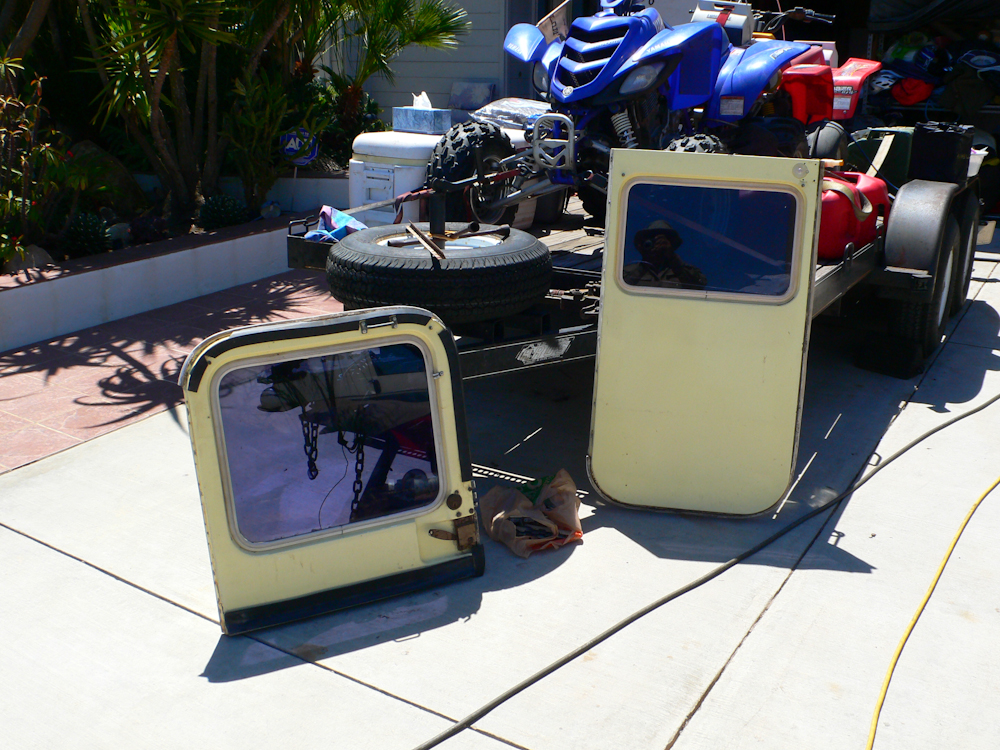
Sadly, to implement this repair, the doors on the back had to be removed. The top door was on the list for replacement anyway, but I wanted to do it on my timescale. Now that is a moot point as the doors are sitting in my driveway. They were pop riveted in place, but poorly. This will be a chance to enhance the installation and make it as bullet proof as the balance of the rig. I think that this is the last "Jed-ism" to be removed from the camper.
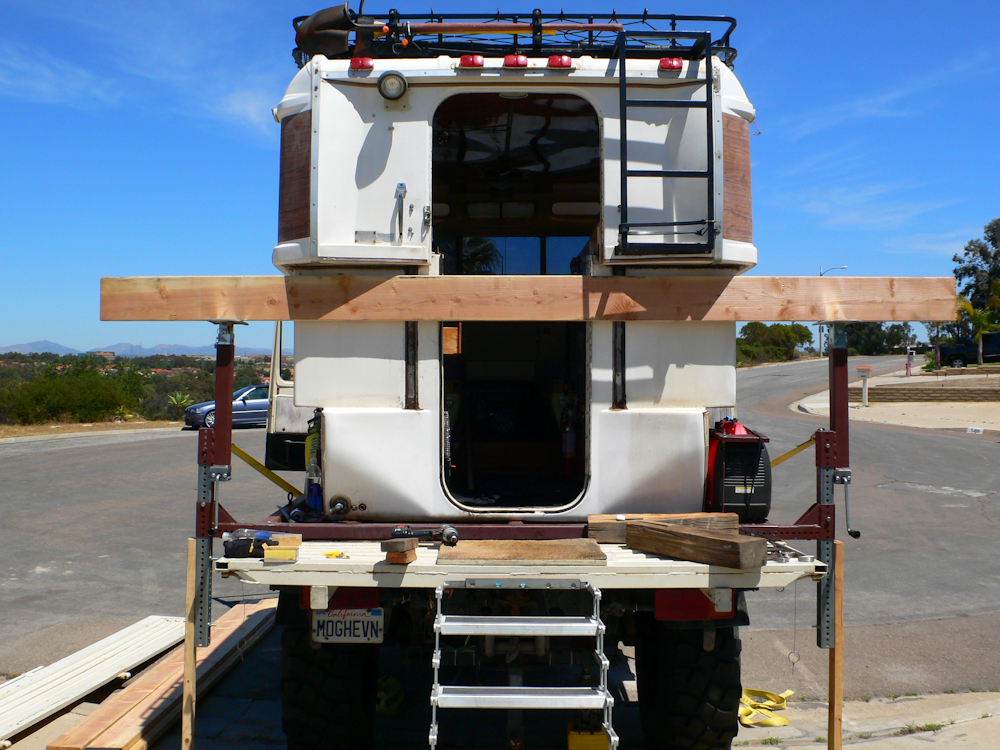
The rear brace in place on the back. Now you can see why the doors had to be removed. The alternative would be trapping somebody in there for the duration of the repair and cleanup. I had no volunteers for that job, so the doors had to come off. While it greatly added to the overall hassle factor to replace 4 $0.25 o-rings, we had to do it.
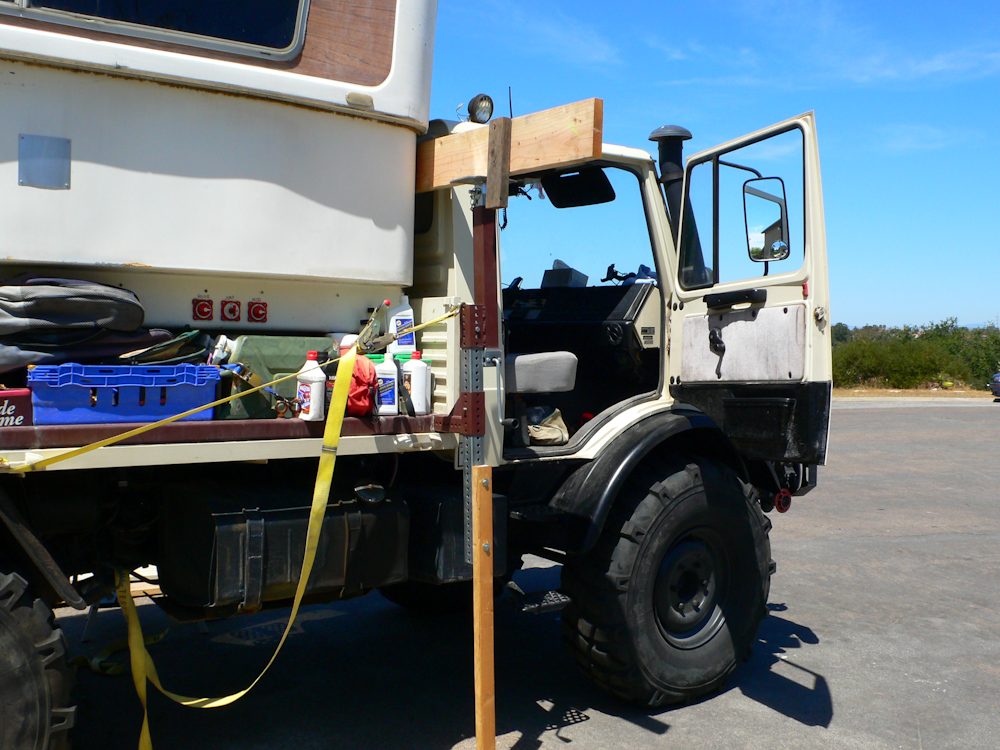
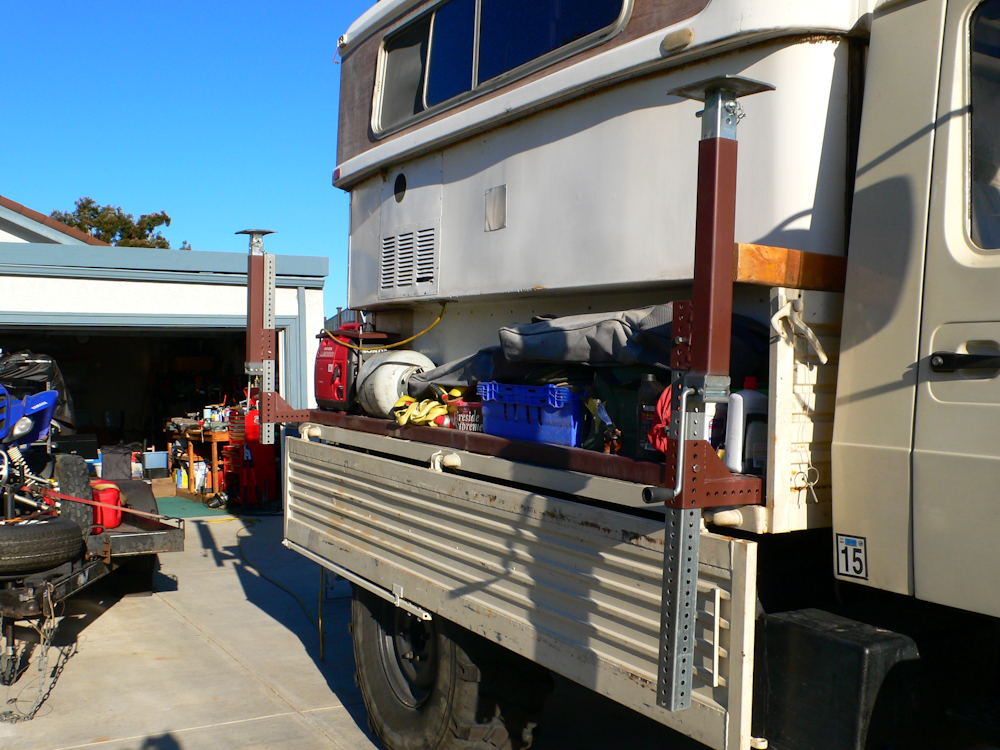
Front lifting spar is in place. We are awaiting the side members.
The side members ride on the underside of the camper's outer lip. We used joist hanger hardware and it worked perfectly.
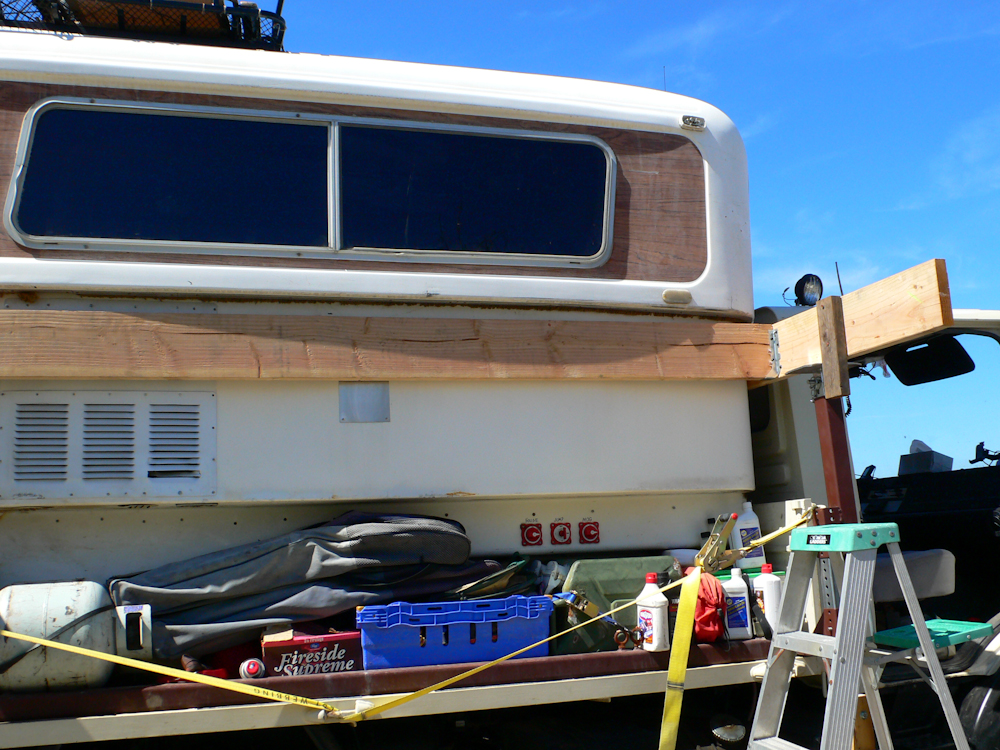
Front and side braces are done, time to lift. Since the corner jacks are screw type jacks, there is a little effort required to raise the camper. Conversely, the light load of the top relative to the max load for the jack meant that it was easy to turn. And, it was easy to precisely control positions of each of the 4 corners.
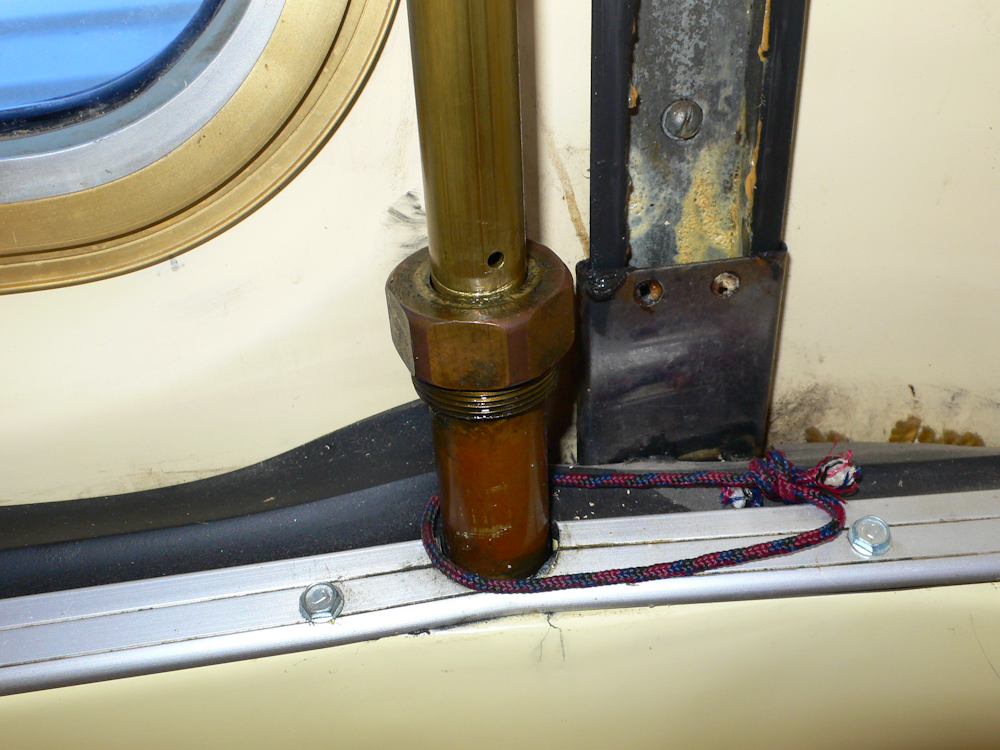
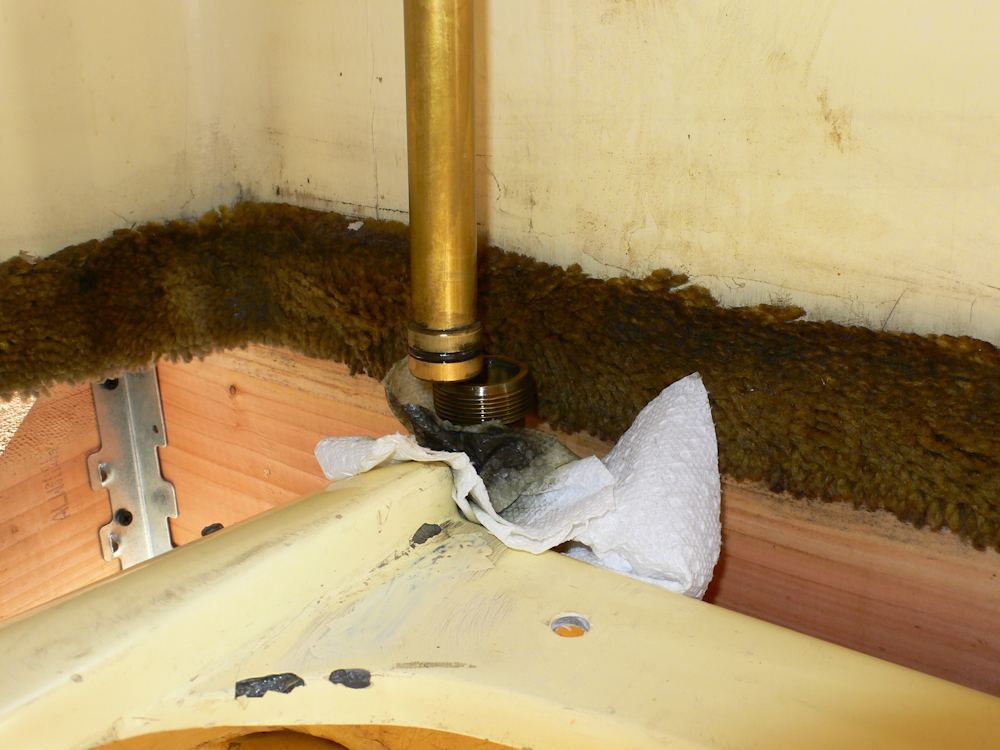
The top of the cylinder has a retainer nut that should never be covered in hyd-oil. That means that the seal has failed and needs to be replaced. The replacement action was to remove the retainer nut, raise the roof to allow pulling the piston out of the cylinder and provide access to the o-ring that was leaking.
We finally got one out. It was filthy, so I cleaned it before taking this photo.
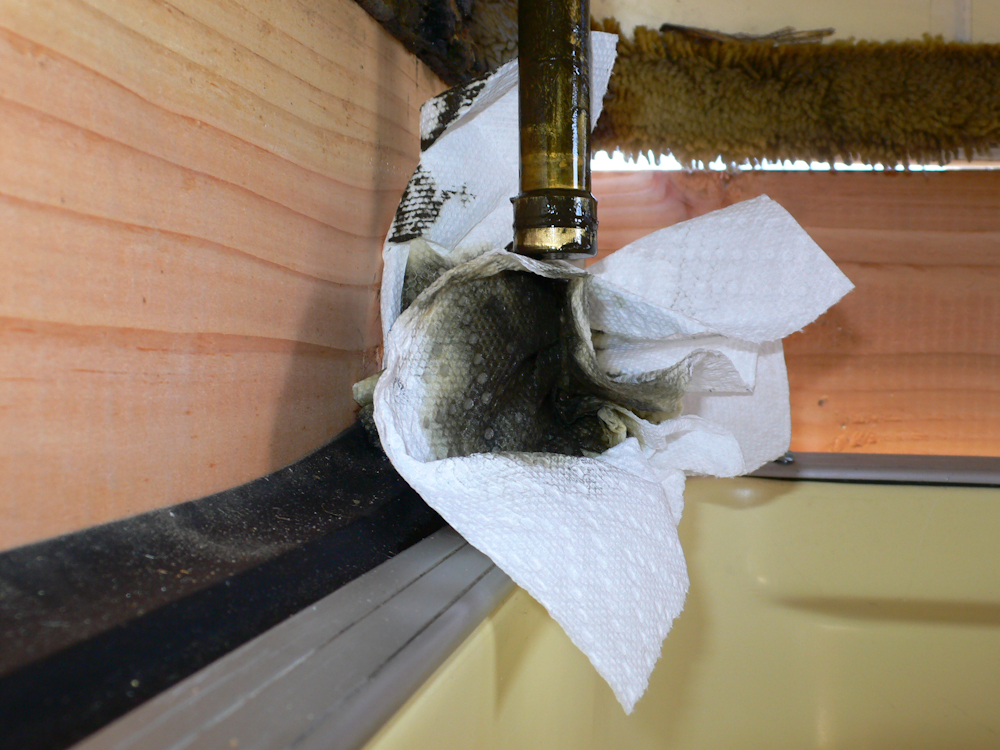
A virgin piston right out of the cylinder. Note all that black goop. EEEEW! 30 years of accumulated contamination.
Most of the internal actions are complete. The seals have been changed, the retainer nuts replaced and the top has been lowered until the pistons are inside the cylinders and the key ways are connected. The setup for the lifting took 3 hours, but the actual replacement of the seals took 5 minutes. The cleanup took hours -- there was either grease or fluid nearly everywhere. We got most of it, but tomorrow we will attack the carpet and attempt to get the hydraulic stains and dirt out of the carpet. If we fail, or it is too badly damaged to refurbish, we will replace the carpet.
It works: we lowered it, and then raised it again. No leaks visible (yet) so wish us luck. We still have to replace the hinges on the doors and hang them on the camper shell.
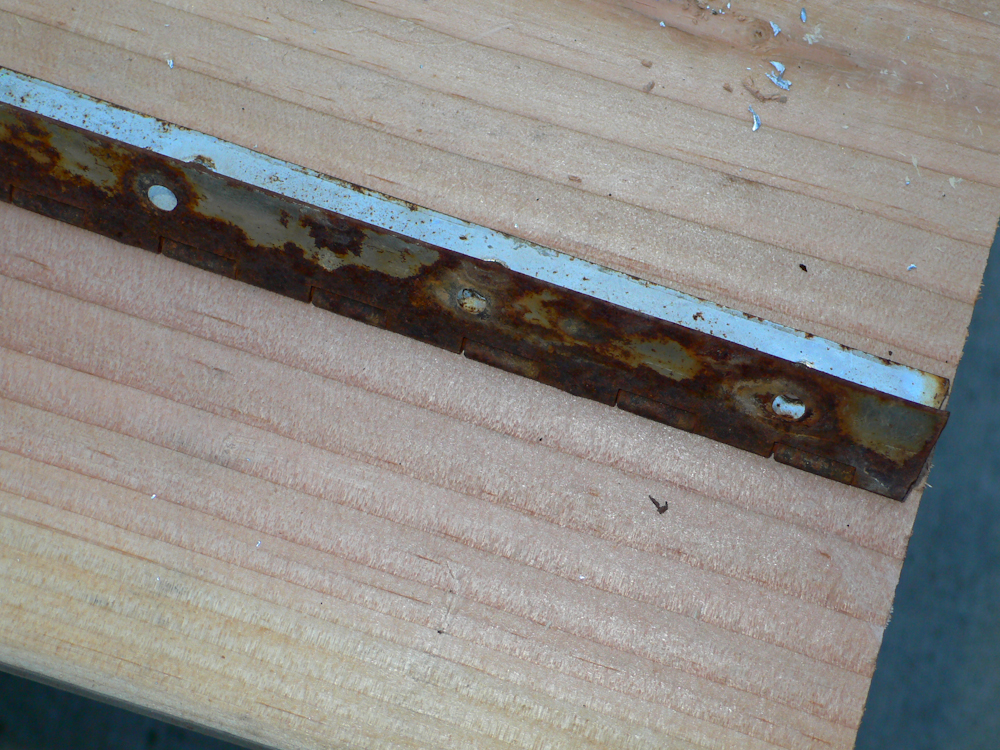
The old hinges were "classic Jed": poor quality materials and even poorer quality installation. The photo above shows what was left of the old hinge. The hinge was not sufficiently robust for the weight of the door and bent/flexed during use. Plus it had rusted since it was installed. Instead of using 3/16" or 1/4" pop rivets, Jed used 1/8" which pulled through the fiberglass.
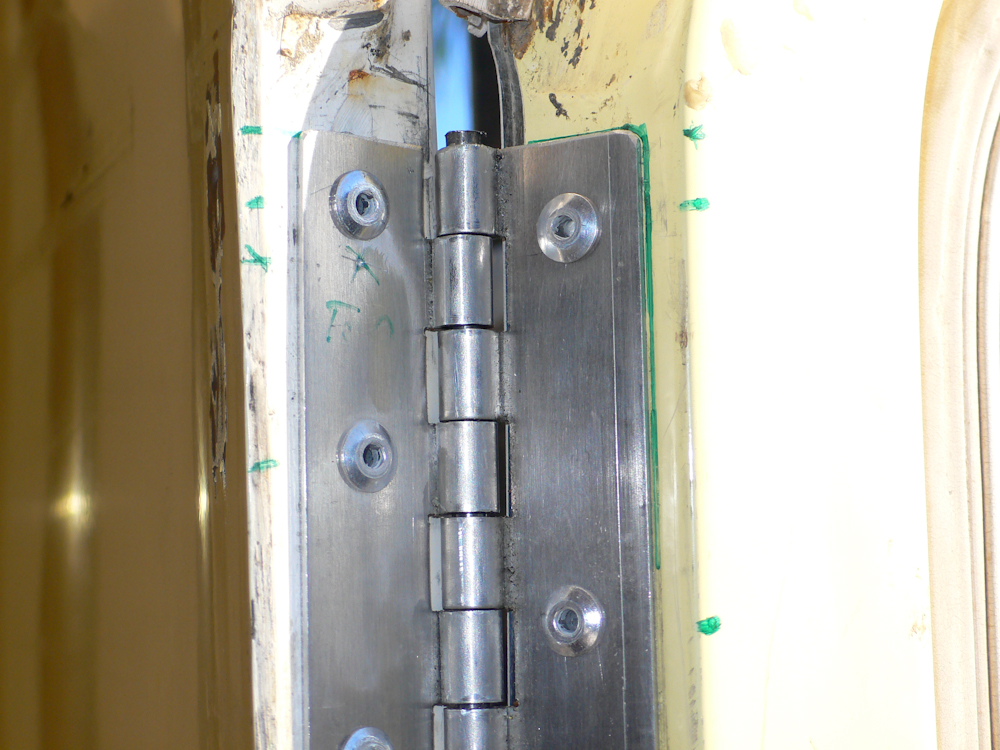
I got the replacements down at the "steel store" and they had a much larger diameter pin and thicker hinge material. I installed them with 3/16" pop rivets.
This set of actions was rather unfulfilling. When we were done, everything looked the same, except the malfunctions were repaired. The only remaining action is the propane mounting bracket. As with all of these actions, it will take longer than you think and be more of a hassle. Only time will tell.