Quick Links:
Zen
and Art Home Disclaimer
Errata
Parts and Parts
Vendors
Truck Sales Service
and Repairs
Engine Fuel Hydraulics Radiator and Cooling
Air System Brakes Wheels Tires Electrical
and Batteries
Transmission Clutch
Axles Hubs Body Air
Conditioning
Tools
Safety
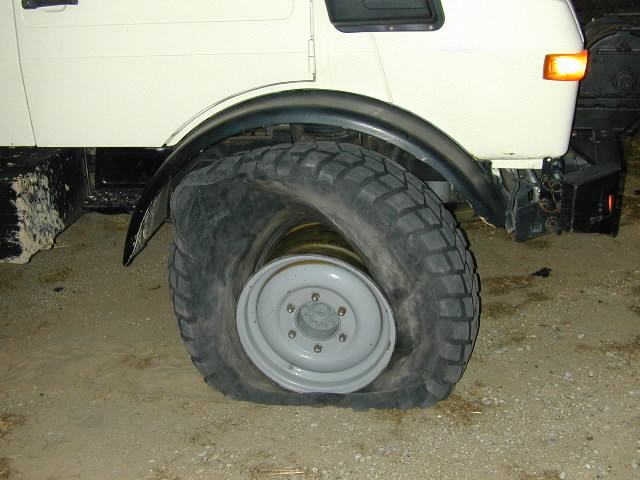
Wheels
I am pretty sure there are several kinds of wheels for mogs. For my 1300, there are sand-service wheels (very wide) and normal wheels. For other SBU trucks there are the heavy duty rims that have very thick flanges and use special lug nuts. I had only 2 sets of rims for my truck, both of the same kind (clearance for disc brakes). I had one set for my XM-47s and another for my 395 highway tires.
There will be a part number on your wheel; use
that as a guide if you need to get another set or a
replacement. Insure that you have the correct offset on
the wheel. Wheels from the 416s can be used on the 1300 if
the offset is the same. Drum brake wheels have a different
offset, so beware.
Tires
The mog is a big truck and big trucks have big tires. Big, heavy, expensive tires. And big tires generate big work when something goes wrong like a flat or a de-bead.
The stock tire for the 1300 is a 12.5R20 or the metric equivalent. These tires are huge compared to passenger tires, but the are pretty wimpy tires in the entire scheme of things. And they really could never make a trip like the Altar desert. The 14.5R20s are better, but still not up to the task of deep, soft sand. The Michelin XM-47s were the only tire we found that could actually operate in the deep sand and not debead. We also discovered that the Continental Sand Service tires worked well, but they are not DOT rated for highway use which required logistical backflips to be able to use them on the trail.
Over the years I ran many kinds of tires on my truck, mostly Michelins but also Continentals as well. The Contis were fine tires, but hard to find (back then); the Michelins were easier. I ran XL, XS, XM, XML and XZL (395s) models on my truck. The XL and XS tires were, in my opinion, shit. They wore poorly and did not handle air-down situations well. The XMs are THE tire to have if you can find them and can afford them. Last time I checked they were in short supply and about $1200 each. XML tires are not really the correct tire for the 1300. In fact, to run them, we had to install a body lift to allow them to fit. The concept of a body lift on a mog is rather absurd given how big the truck is, but that is what was required to allow the tires to fit without rubbing. The benefit is that XML tires can be had surplus for about $150 for a mostly new tire. And, if most of your travel is going to be on asphalt, why grind down your expensive and rare XMs on the pavement. My solution was to buy a spare set of rims and mount the ex-mil tires and head out. Our trip to Alaska and back was on ex-mil tires. Ditto for a cross-U.S. trip the following year. The 395s really want a 10" rim and the mog rim is 11". So, getting these tires to set the bead is hard (ether-explosion hard). And, because of this, they cannot air down well. 20 psi is the minimum we would run with the bigger tires.
The XMLs are a different tread pattern and are
available in multiple sizes. 365mm is the correct size for
the 1300. See the Michelin web site for details.
XMLs also come in 395/85R20 because that is what we run on
Thor. The 395s could work on a 1300 if the body has been
lifted and the fender position adjusted. See the Body section for details.
Tire Tools
De-beading tires is easy when you operate at low pressure in deep sand. But, for some reason, they are really hard to de-bead when they have ZERO air pressure and you are trying to get them off the rim. The duck-billed hammer can work, but these are hard to use and will damage your rims when you miss (and you will miss). The best tool I have found for de-beading tires is a special purpose tool available at Gemplers.com This tool is a bit pricey, but when you see the costs of the other tire tools that you are going to need, this one becomes worth it.
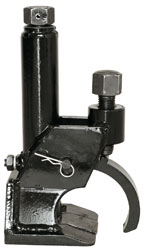
I have one of these and it rocks. You take the chisel
foot and tap into the junction between the wheel and the tire
and then tighten the foot clamp over the lip on the wheel.
Then, you take a socket wrench (not impact) and just turn.
The center foot of the chisel comes down and breaks the
bead. No muss, no fuss, no sweat and best of all no damage
to the tire or rim. About $175.
Breaking beads is hard work if you use a hammer,
even a duck-billed sledge hammer designed for tires. I
recall an episode where I needed to break a bead on an XM-47
that had been on a wheel where the hub melted down. The
heat of the hub melted some of the rubber. Mark Mitchell
and I beat on it for about 1/2 hour before we decided that it
was hopeless. Then we placed the tire on the asphalt
street and ran over it with his 1300 and it STILL did not break
the bead. Then I got the bright idea to use my high-lift
jack. We put the foot of the jack on the bead and the nose
under the bumper of his 12,000 pound 1300L. The jack
punched through the sidewall of the XM-47 ruining the tire BUT
THE BEAD WAS STILL ATTACHED. My Gempler's tool arrived the
next week and in 30 seconds I had the bead broken using just a
small hammer to seat the chisel and a 30 mm open end
wrench. I could have saved a $1200 tire if I had only
known.
Even if you don't use the duck bill hammer to break beads, you will still need one to change rubber on your wheels. The duck bill serves to concentrate impact energy where it is needed like when you are attempting to install a new tire on a wheel.
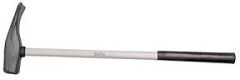
Gempler's sells Ken Tool hammers with fiberglass shafts for about $130. These are a required item if you are changing rubber.
You will need a set of bars or "tire spoons" as well. These are hardened and are required to stretch the tire over the lip of the bead when removing or installing rubber.
These bars are Ken Tool as well (the heavy duty standard) and they are not cheap at about $180 each. You will need 2. And you will likely need some smaller pry bars as well.
I am not an advocate for Gempler's but they have treated me
well. I have purchased plenty of stuff from them and they
always got me what I needed. This bar is a bit shorter and
under $100.
Process
The trick to getting tires on and off is getting the bead correctly positioned in the appropriate trough in the wheel. Once the bead is broken, inspect the inside of the wheel and you will see that there is a depressed region. You need to place one side of the bead in the depressed region before you attempt to use the bar to stretch the opposite side over the lip of the wheel. Keeping the tire in the correct position is hard. We have tried wooden blocks, ratchet straps and other methods, but the short story is it is not easy.
To keep from ripping the rubber on the bead, coat it liberally with a mixture of dish soap and water. Get a dish brush from you wife (tell her to kiss it goodbye as it will be filthy and unusable for dishes when you are done). Use the brush to slop the soapy water on the bead and the rim. You will have to re-apply it frequently if the weather is hot or dry.
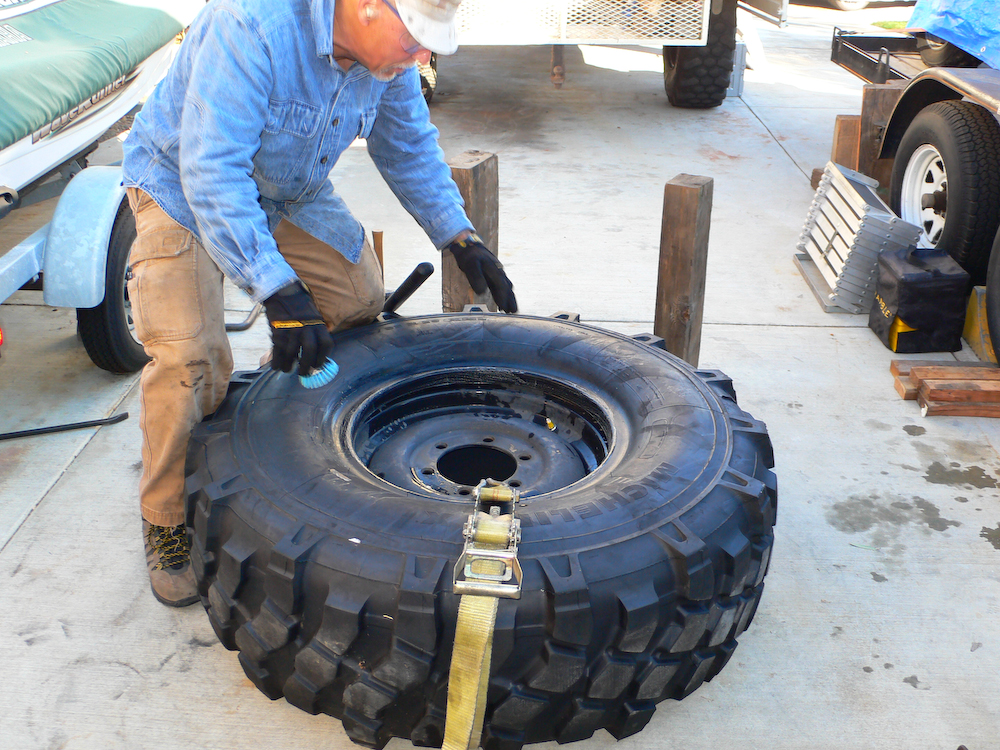
Using common dish soap or special tire lube will make seating
the beads easy. The ratchet strap was used during the
seating process to hold the tire in the correct location
relative to the rim. These 395s are big and heavy and a
bitch to mount. Kathleen and I have done many of these by
ourselves.
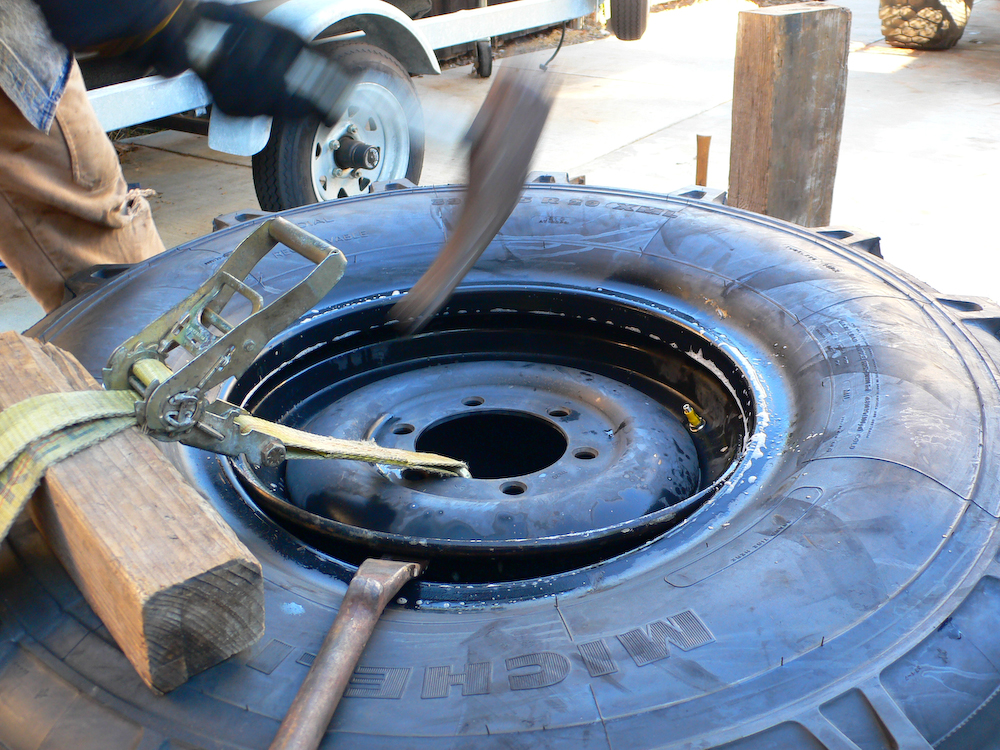
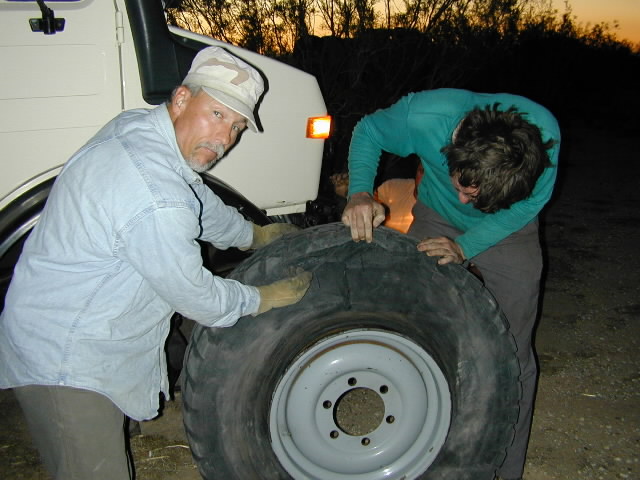
Using two folks and two bars and a large pry bar or screwdriver, start by pulling the bead over the lip of the rim and then work your away around. Use the small pry bar as a "place holder" while you reposition one of the bars. You and your partner work in opposite directions until you succeed.
The regular mog tires at 12.5R20 are easy compared to the 395/85R20 ex-mil tires. Kai and I have mounted and dismounted 16.00R20 tires as well and they are really tough. When we changed rubber on my 411 mini-mog, we did it 8 times in one day (4 off and 4 new ones on). Hard, sweaty work.
Seating the bead after the tire is mounted is a whole different challenge. Kai and I have seated dozens of tires with ether. It is dangerous and scary, but sometimes it is the only way. The best way is the Cheetah Bead Seater tool (Gemplers again or Northern Tool). This is an air cannon and it requires both care and some technique in it's use. It recoils, not unlike a shotgun, and having someone brace you is a good idea. If you do not have a good purchase on it when you set it off, it will go flying. In my case, it was past my head without impact; but it was close. It took several attempts before we got it right.
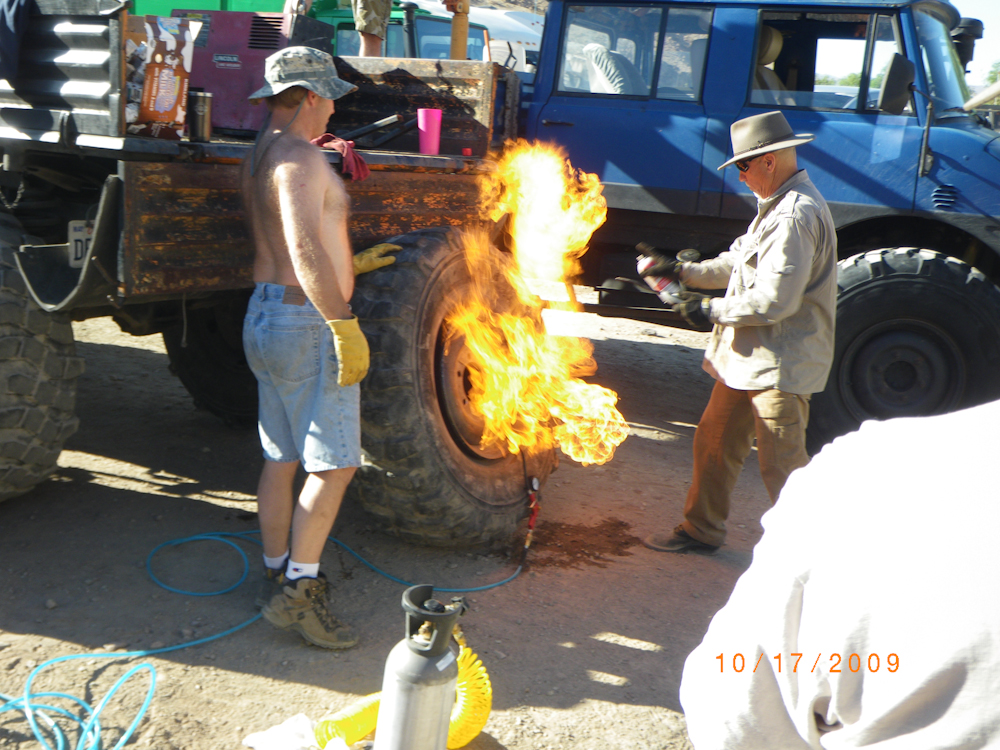
If you have no other choice but the ether, then try this: lube the rims and the bead of the tire. Set the tire up similar to the photo below. Unlike my partner, I don't suggest doing this operation bare chested, so wear a long-sleeved shirt and gloves. Remove the valve core of the tire and put on your safety glasses. When you are ready you will need a can of starting ether, a BBQ lighter or a press-start propane torch. The method is as follows: spray a full one-mississippi, two-mississippi; three-mississippi count into the crack between the tire and the rim. Move the nozzle around the tire to help distribute the ether. Rapidly back up 3 full paces. Using the torch or bbq lighter light a spray from the ether can as it is pointed at the tire. This allows you to be away from the tire when it goes off. If life is good, it will go "woof" and the bead will pop onto the rim. As rapidly as possible after the explosion, the air must be applied to the valve to prevent the cooling gas from sucking a vacuum and pulling the tire off the rim. It is best to do this with 2 folks and full air pressure in your truck (have the engine running and the RPMs ramped up with the hand throttle). Person one sprays and lights, person 2 sprints for the valve with air hose in hand at the earliest possible point after the controlled explosion. If you spray extra fluid on the tire, the tire will start on fire. Whoever is not applying air has to do fire control. Expect to fail the first time or two.
The most common failure is going light on the ether. A full 3 count has worked well for us, but you may be able to do it with less. If you do it with less and it fails to seat the bead, use the air hose to blow the combustion products out of the tire and refresh the air for the next attempt.
SO THERE IS NO CONFUSION, I AM NOT AN ADVOCATE OF
THIS TECHNIQUE AND DO NOT RECOMMEND YOU TRYING IT UNLESS YOU
HAVE NO OTHER CHOICE. THIS PROCESS IS DANGEROUS AND THERE
ARE MANY WAYS TO SCREW IT UP. Disclaimer disclosed, we
have used the process to seat 8 big 395s on mog rims with no
issues. Happily, Thor has split rims so most of these
issues are not relevant.
Seating a bead with ether is not for sissies. The chance of a "mistake" is significant and the results can be catastrophic if not done correctly.
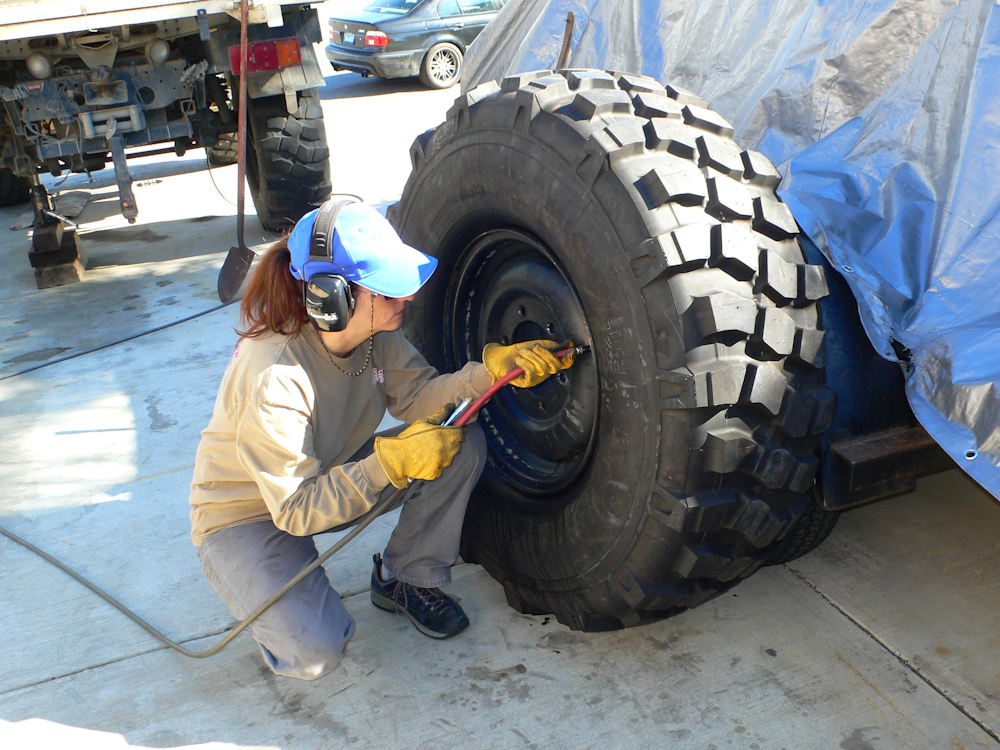
Kathleen fills the tire to operating pressure after the bead was seated. Look carefully to the right of the tire and you can see where the ether we used on a previous tire set the tarp on fire. Setting things on fire is just one of many possible problems you can have when using either.
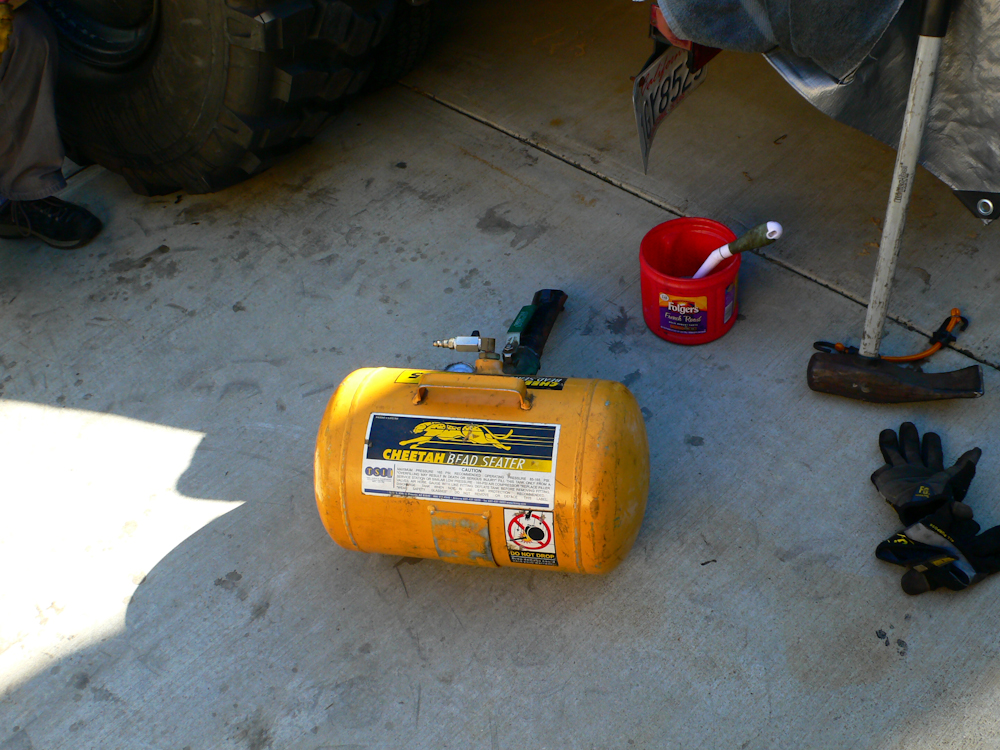
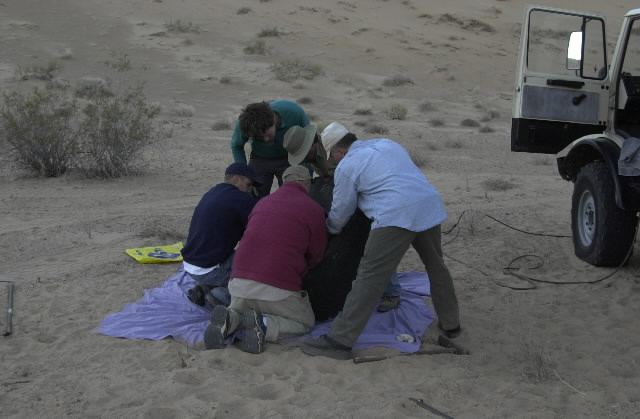
Once the air system was completed, we went on to tires. I managed to score a full set of new ex-military Michelin 395/85R20 XML tires for $1200 delivered, but we had to mount them. We totally wore out the set that was on the truck during our 15K mile trip, so it was time. Kathleen and I did all the work, and it was hard. Dismounting and remounting a set of these brutes is a real workout. But, the most challenging part is getting the beads seated. Last time, we used ether and it worked fine. This time, for whatever reason, we had much less luck. So, we borrowed Dan Johnson's Cheetah seater. Basically, it is an air cannon. You pump it up and when it is to full pressure, you put the nozzle in the crack between the tire and the rim and rapidly open the valve. There is quite a lot of skill required and if you are not braced it will knock you down. Ask me how I know.
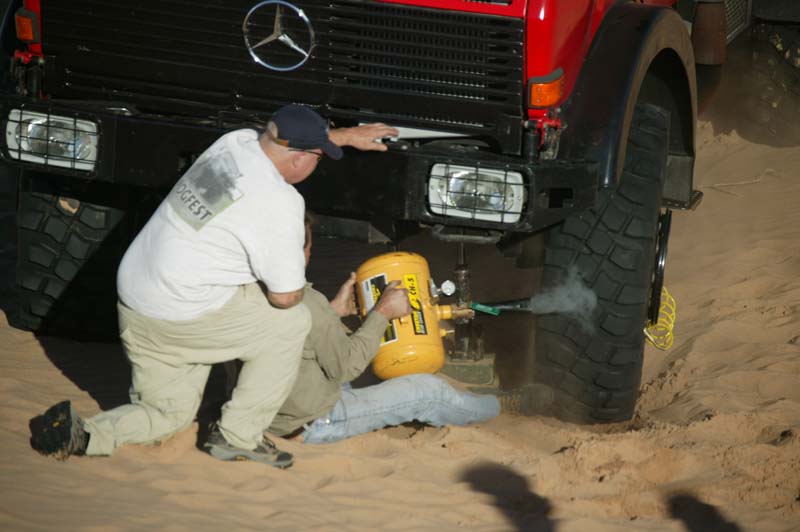
The yellow device is a Cheetah Bead Seating cannon. You pump it to full pressure using the truck's air compressor and then use it to seat the bead with a blast of compressed air. The "smoke" is actually water vapor from the rapid reduction of pressure. At this point Dan has 3 flats at one time and one of the tires has a ripped sidewall. Note that Dan's knee is bracing Kai from the recoil of the cannon.
Insure the Pressure is Correct
The best way to avoid the effort of changing rubber is to insure that your tires are in good shape and avoid trail hazards. This means insuring correct inflation. And, never operate at high speed at low tire pressure. If you do, you are guaranteed to get a blow-out. I had a tire that was had a slow leak and I forgot to check the pressure after stopping for dinner on a road trip. We had a blowout at 70 mph; we were lucky, we did not lose control of the truck. If I had checked the pressure after dinner and inflated the tire it would not have happened.
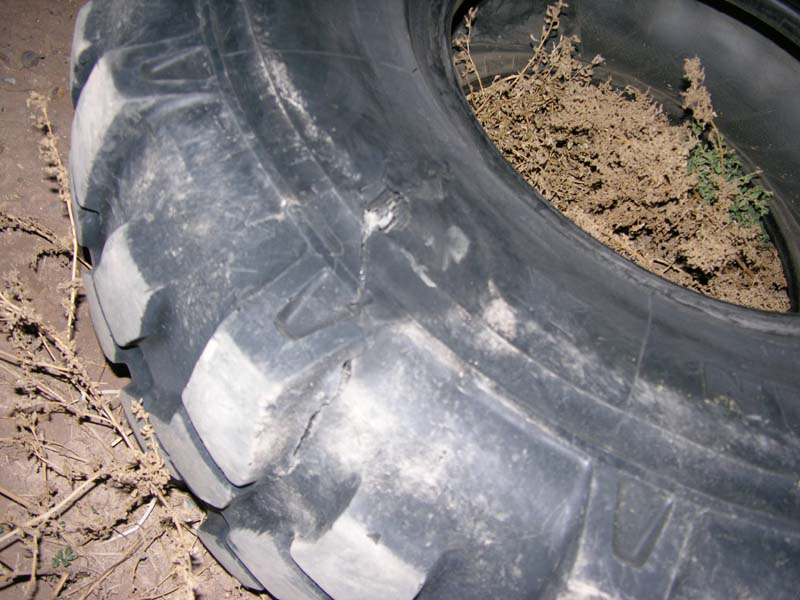
Result of operation of low pressure tire at full highway speed: blowout.
Note the size of the tread separation.
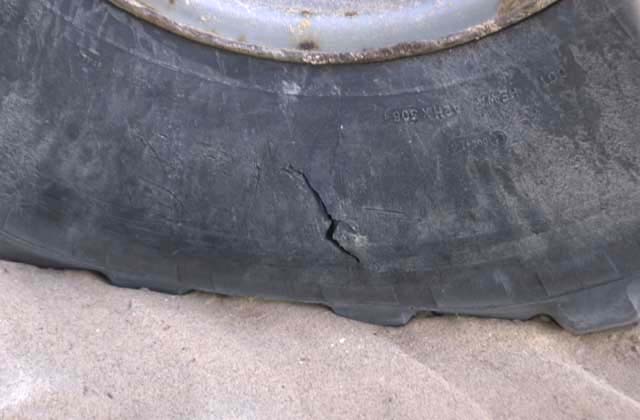
We had to beat the tides along the cliffs in the Altar, so we
did a high-speed run with low air pressure. This resulted
in damage to the side walls. This tire eventually had to
have a tube to be usable. The crack in the sidewall is the
result of the heat from sidewall flexing at high speed.
Heat kills tires.
Balancing Tire and Wheel
In addition to insuring that the inflation levels of your tires are consistent with the load, another method of avoiding issues is to insure that the tires are balanced. Balancing these big, heavy tires is problematic. The current state of the art is to use balancing beads inside the tires. There are a number of brands; Equal, DynaBeads, etc. They are, as far as I know, all equivalent. They are small ceramic or glass beads that are inserted inside tubeless tires when the tires are mounted. Usually they come in packets that are tossed in whole before the bead is seated. The packet falls apart releasing the beads. The beads dynamically redistribute themselves until balance has been obtained. What is interesting is that they redistribute after each stop of the vehicle. So, as the tire wears, the beads change them position in response.
For big tires on mogs, use 12-16 oz per tire. 12 oz is sufficient for the normal tire or the 14.5R20. Use more for the XM-47s or the 395s. Follow the manufacturer's suggestion on amount based on tire size. I swear by these beads; they work great and the beads can be captured from old tires by scooping them out and brought forward to new tires when the rubber is changed. They are not cheap, but it is still cheaper than using the old spin balance method. That is assuming you can find a tire shop to attempt that on your 20" rims. Even the large truck shops will not do it; they all use beads now.
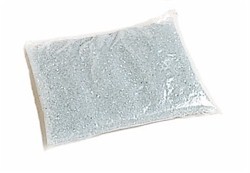
Gemplers has 12oz bags for about $20 each. You need (at
least) one bag for each tire. Read manufacturers
recommendations on amount. You can use fractional bags in
a tire if you have a scale to measure the amount.
Be aware that depending on the type of beads that you use, you may have to replace your valve cores with the ones supplied with the beads. Sometimes the beads get stuck in the core when you are attempting to air down. The easy solution is to just remove the core with a core tool and clean it while the tire deflates to train pressure.
Correct Pressure for the Situation
I really cannot say enough about insuring that you have the correct pressure for your operating environment. You will have to tune your pressure based on the specifications on your tire. To do it right, get your truck weighed: total, front axle only and back axle only. Then using the info on the sidewall, determine the starting pressure based on the axle load. Remember, the tire load is 1/2 the axle load.
So for example on "Thor" my 1017, my 395/85R20 tires say something like "12,000 lbs at 120 psi cold" on the sidewall. So, dividing 120 by 12 gives 10 psi per 1,000 pounds per tire. Thor weighs 20,000 lbs and is equally balanced per axle, so 10,000 pounds per axle and 5,000 lbs per tire. Since the spec is 10 psi per 1,000 pounds, then I would start at 50 psi. Then, examine the sidewall flex from the front or rear of the truck. You should see some deflection, this is normal for radials. Adjust your pressure according to your ride and handling preferences. I use 55 psi on my tires; they are wearing evenly and run good on the highway.
Your mog will weigh less so you will have lower
pressure. On my XM-47s, I was running 34-36 psi on the
highway; less on the trail of course.
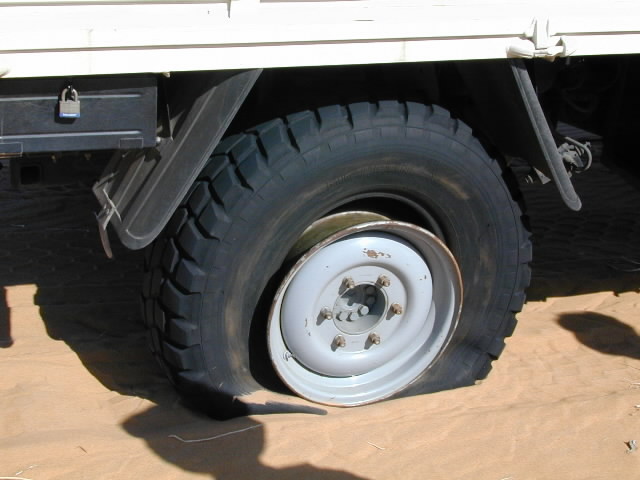
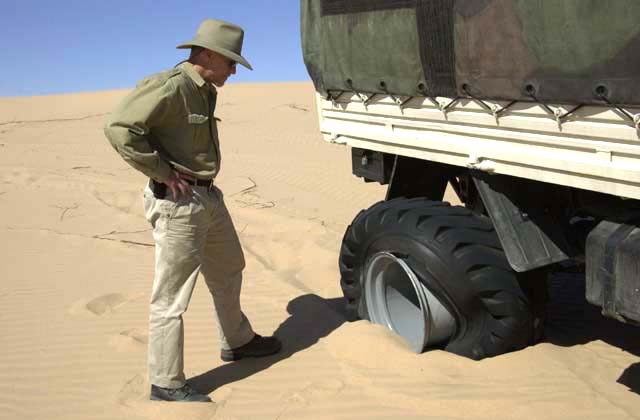
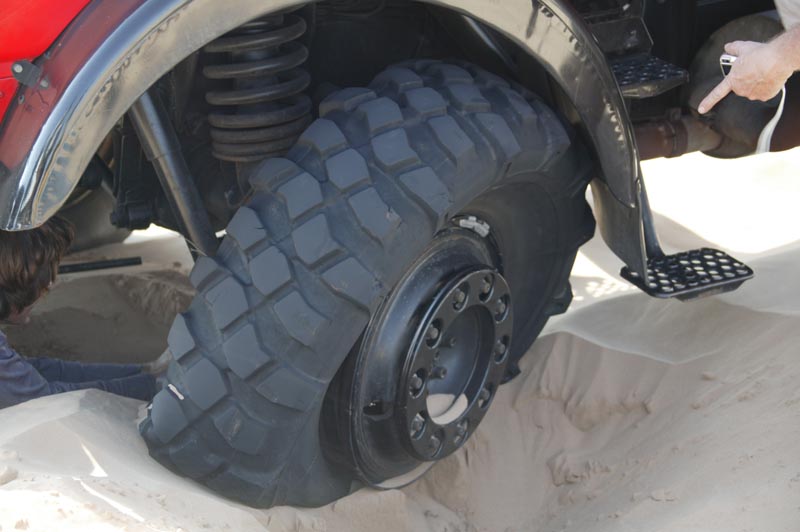
In the Altar Desert of northern Sonora Mexico, the sand is
very, very soft. The tires in the photo above are 14.5R20
tires (which are bigger than the stock 12.5R20 mog tires).
But these tires still got stuck in the sand at 15 psi. By
the time we aired down to 12 psi, they came off the rim
requiring a re-seating exercise with ether.
I had a damaged tire from creosote and we attempted to install
a tube. It only took 2 tubes and 3 tries to get it
right. Liquor may have had something to do with these
errors.
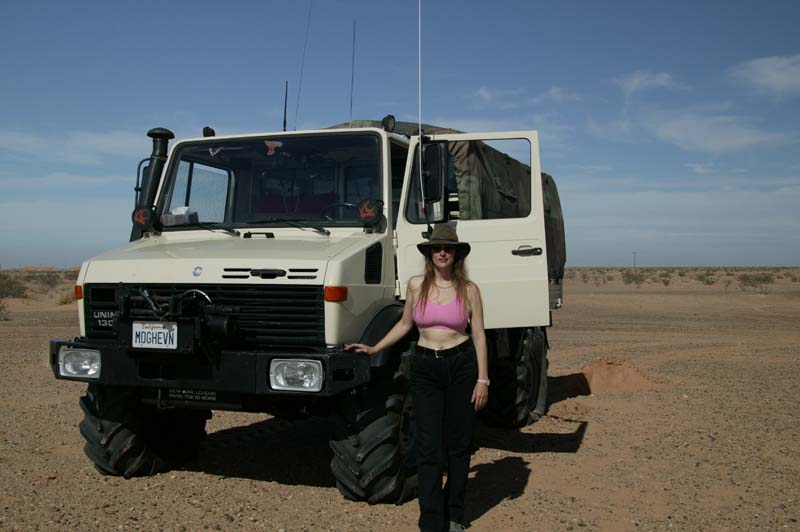
After the debacle on our trip in 2000, I decided to get some Goodyear Terra tires for our next Altar outing. These tires were not DOT rated and could not run on the asphalt faster than about 25 mph due to vibration. So, we had to put the tires on a trailer, trailer them to Yuma, change tires in Yuma and then drive to the trailhead at 25 mph. The photo above was taken before we got into the deep sand. You can see how wide they are. So wide, in fact, that I had to remove the front fenders and the steps due to mechanical interferences.
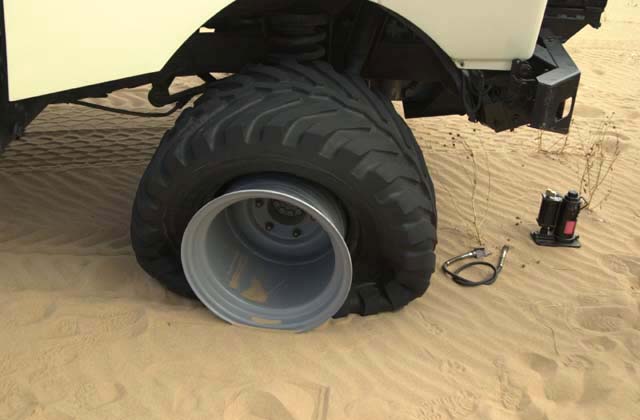
We soon discovered that 12 psi was required to keep these tires
on the rim. This was the first failure of many this day.
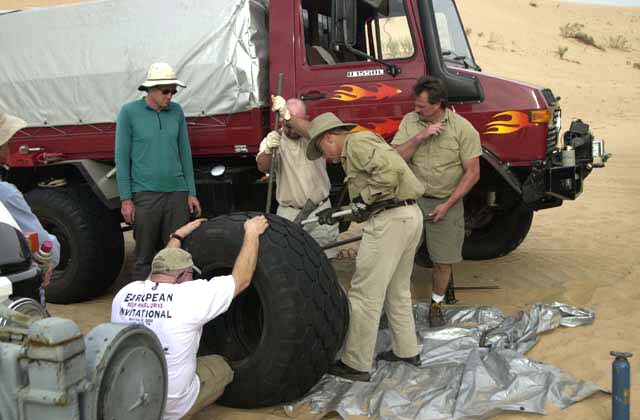
I was not singled out for special treatment; Dan also had
multiple de-beads. Plus, his tire needed a patch inside so
we had to take it off the rim and then reinstall it. Tons
of work. Note the long bars and duck billed hammer.
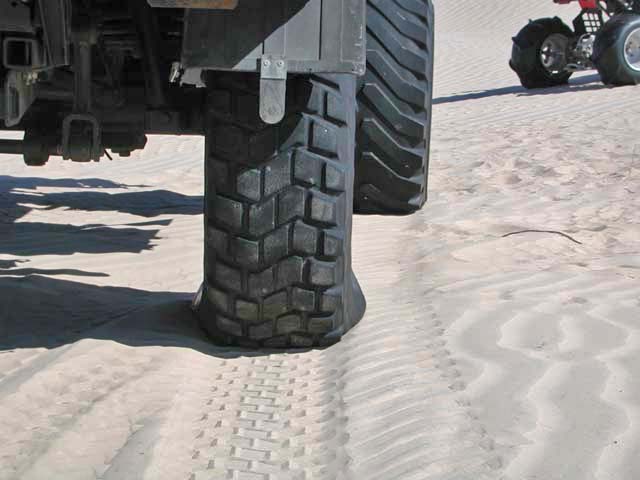
This time the friggin' thing twisted itself on the rim.
This tire de-beaded a total of 10 times on this trip. The
rims were too wide for the tire, thus requiring higher air
pressure to keep them seated. But, when the pressure was
up I got stuck in the sand; it was a no-win situation.
Yet another de-bead.
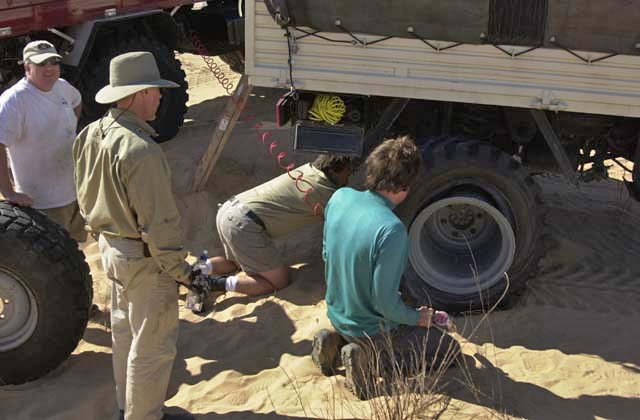
We finally took the problem tire off and resorted to one of the
14.5R20 Michelins. But, we had to run this at 15 psi to
keep it on the rim. Still, they were splayed out pretty
good.
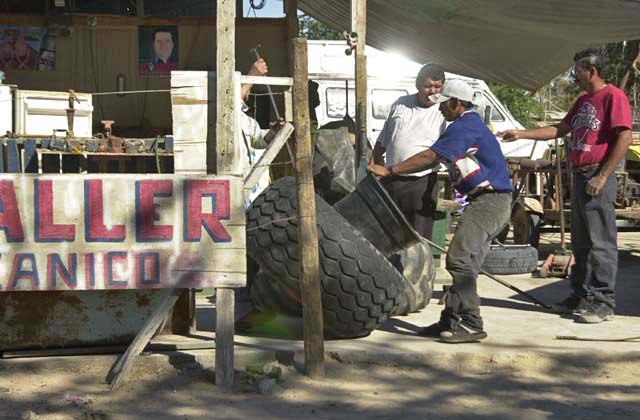
Dan took his problem tire to the llanteria in El Golfo to let them take a hack at it. Their repair lasted about 2 hours.
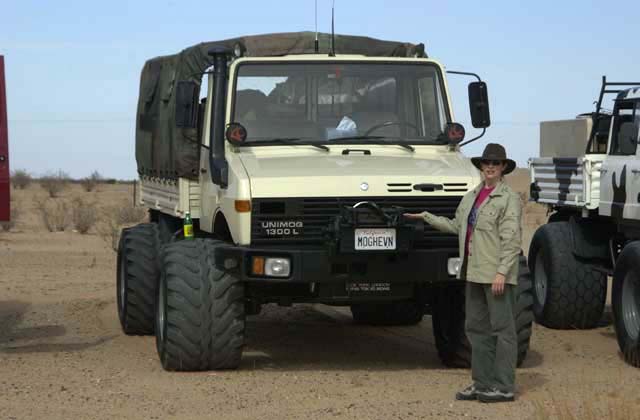
As a group, we eventually went to the Michelin XM-47 tires. These are DOT rated and 425mm wide and can operate at very low pressures. They "want" a 12" rim and the mog rims are 11" so they stay seated even at single digit pressures. Our tire issues in the Altar went away once we all went to XM-47s. The photo above is not very good for showing the tires, but the bumper dressing looked good.
This is a Michelin XS that was not up to the task of low pressure operation.
Later than night, Dan had a blowout on the freeway at full
speed. Note the rip in the carcass of the tire.
Quick Links:
Zen
and Art Home Disclaimer
Errata Parts and Parts
Vendors
Truck Sales Service
and Repairs
Engine Fuel Hydraulics Radiator and Cooling
Air System Brakes Wheels Tires Electrical
and Batteries